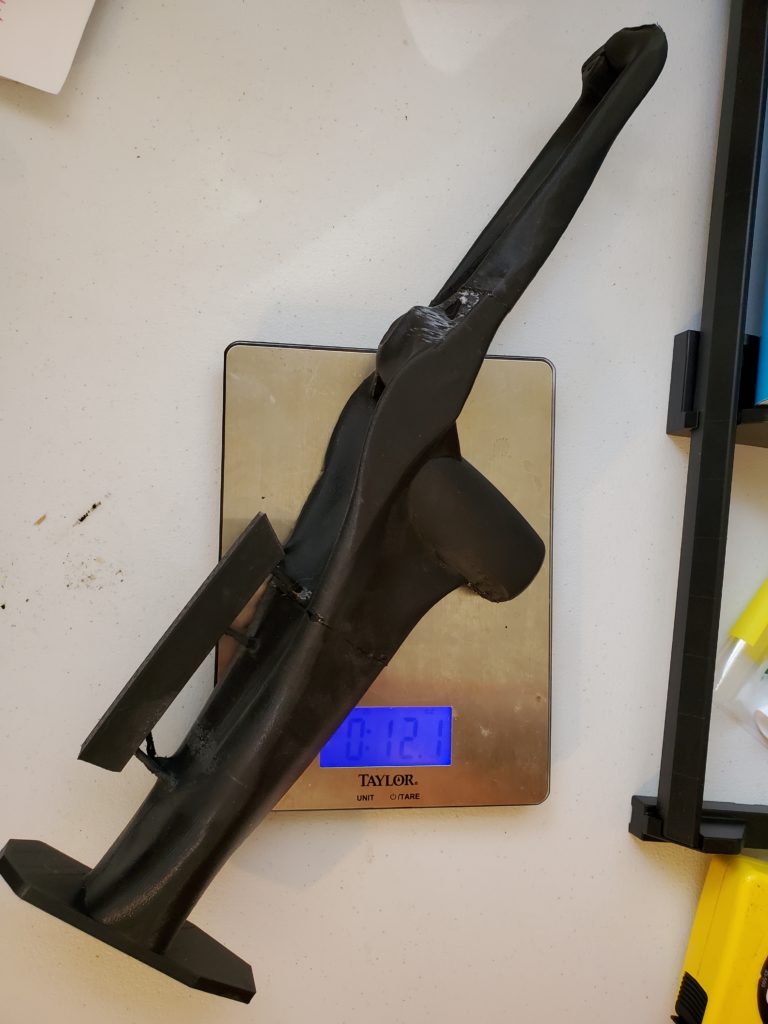
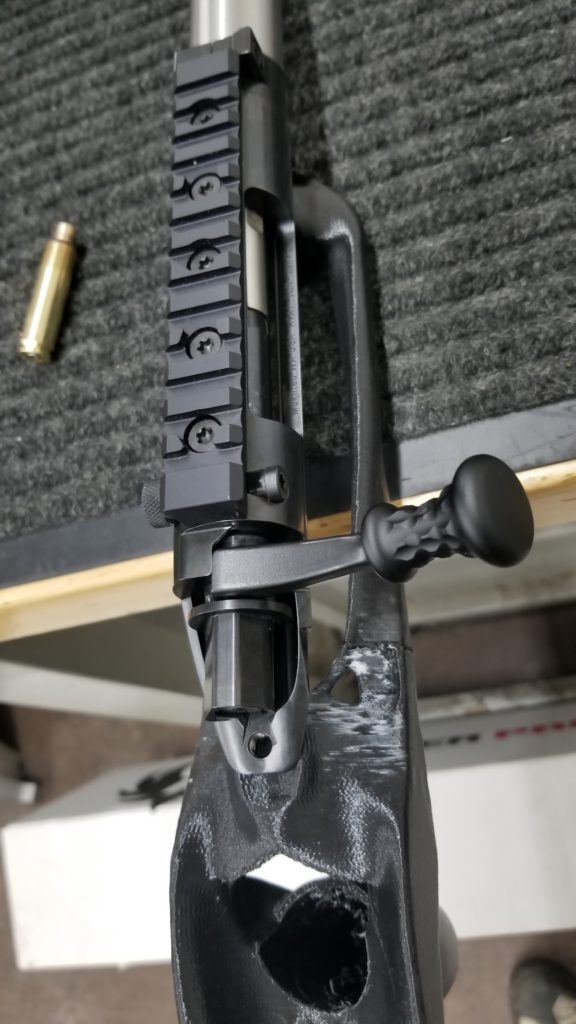
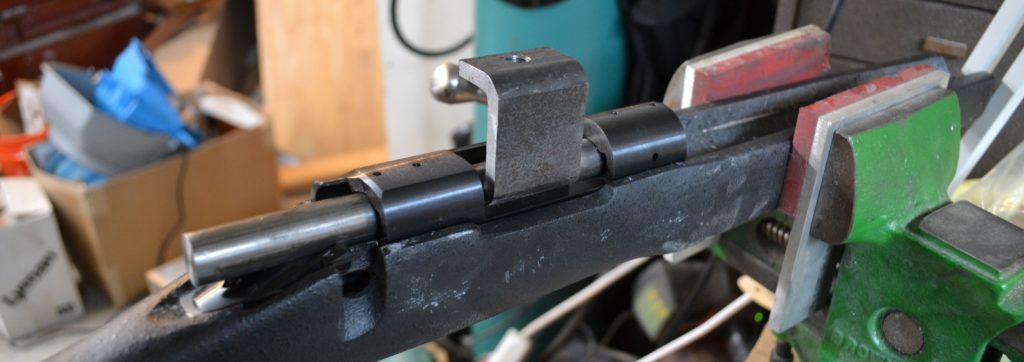
Because sometimes you just need to shoot it. Yeah, I shot it.
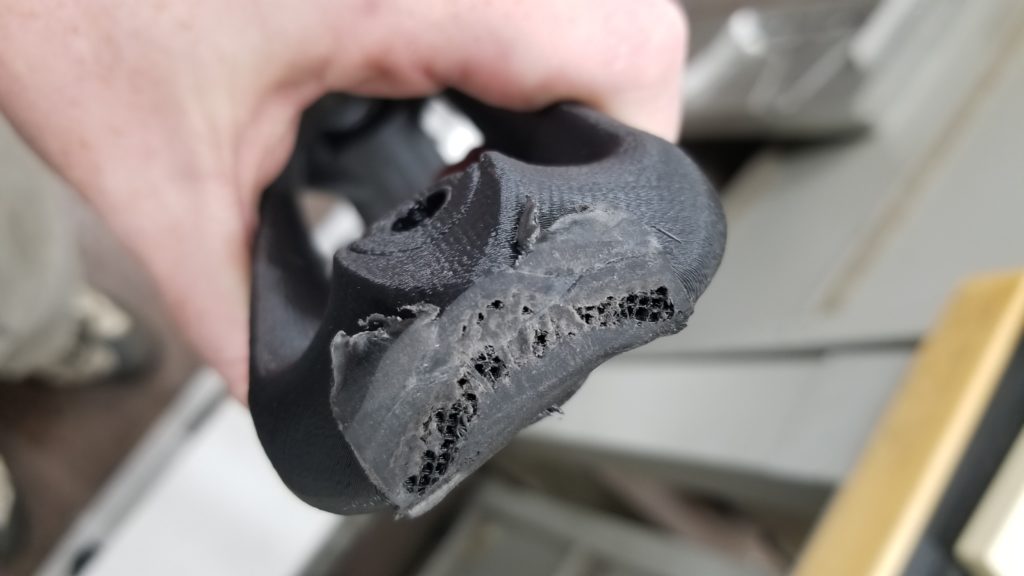
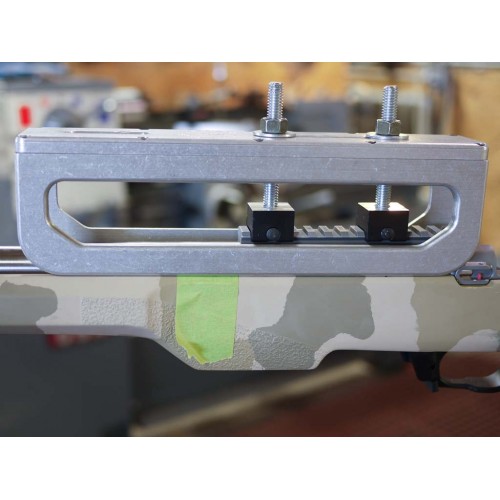
At 12 oz. it isn’t actually particularly light for what it is, but it should be clear that most of the weight is in the buttstock area and the rails supporting the lug face are actually quite delicate.
The lug face has to be modified a bit with a belt sander to make things fit, so it was recoiling against not much more than the infill.
This was shot 1 time with a healthy 284 Winchester load. It survived.
Bedding a rifle is one of those procedures that makes you pucker your bum a little and just hope beyond hope you got everything right… The reality is the process is neither difficult or complicated, just fraught with consequence.
On the front side, it ends up being all about preparation, roughing the surfaces, masking off areas epoxy should not touch, laying out any tools or supplies that will be needed. Once the bedding epoxy is mixed you are on borrowed time, being well prepared ensures you can proceed calmly and meticulously.
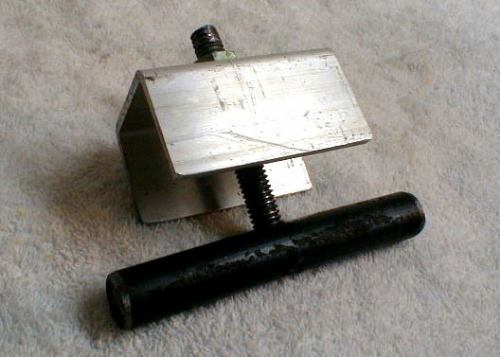
On the back side, there are a couple of tools that make the whole thing sail quite smoothly. I would argue the tools topping the list are a good sharp wood chisel and a receiver heaver / action puller / bedding jack / whatever you want to call it.
Even though some form of receiver puller becomes a must-use tool for those that have used one if you do a bit of searching you quickly realize most people who bed a rifle don’t use one. They use some combination of whacking with a hammer, prying, hoping, and praying instead.
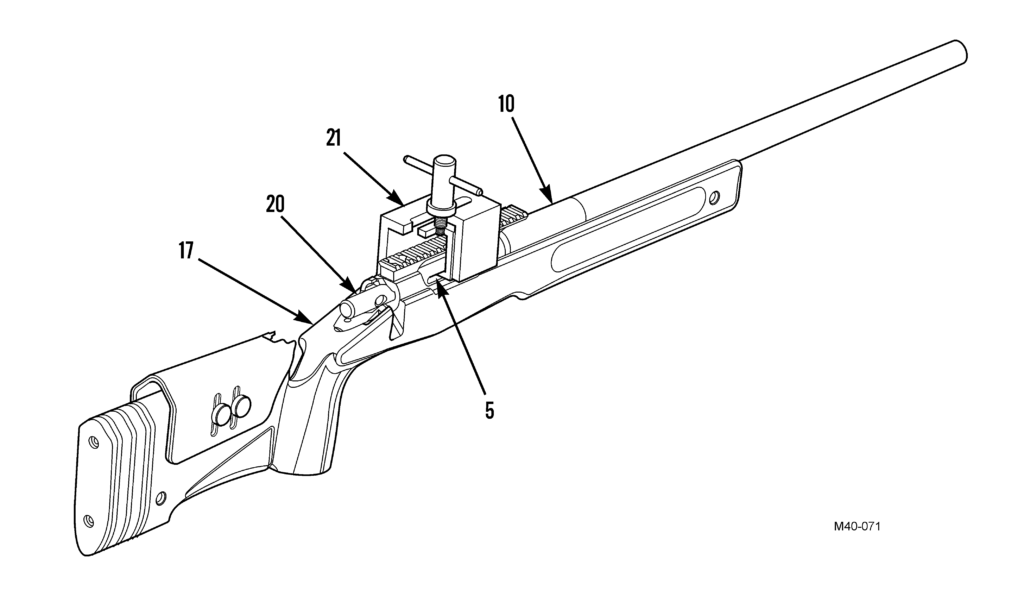
Building an action jack / receiver jack / bedding puller / (I’m sure I can come up with a few more combinations) is a pretty easy affair, often from scrap materials. I will detail a few different variations that can be found online here, along with links to the original sources. The first, obligatory, reference is to the US Marine Corps M40 Maintenance Manual. It shows a simple cutaway diagram of an “action puller” to be used when skim glassing.
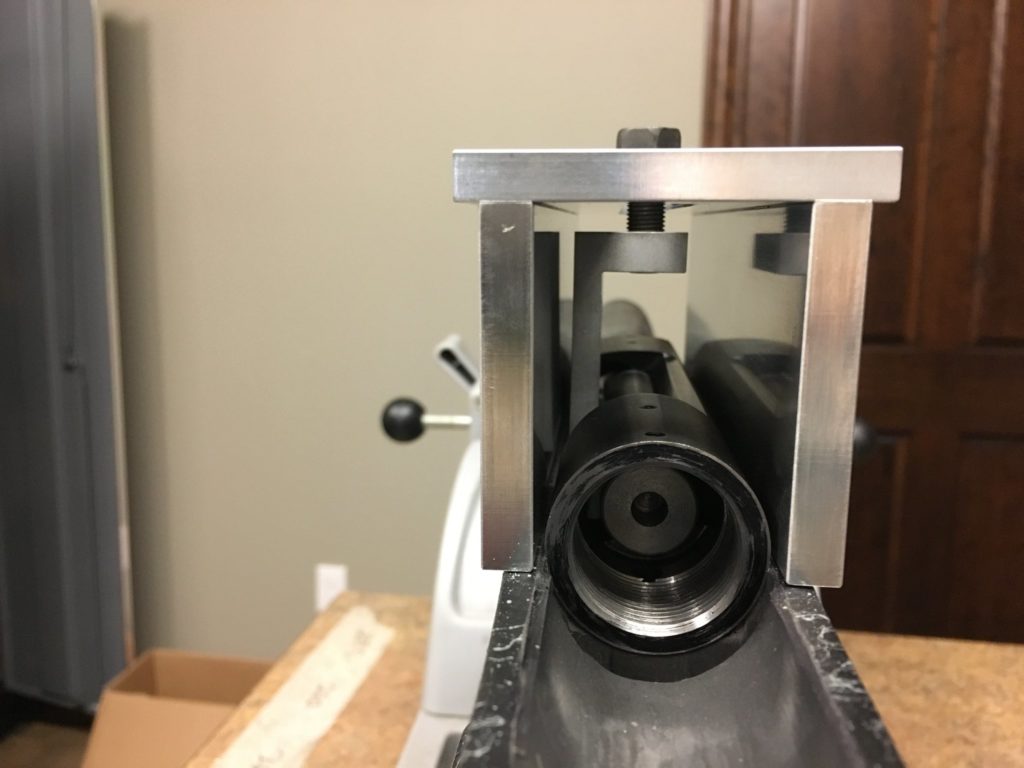
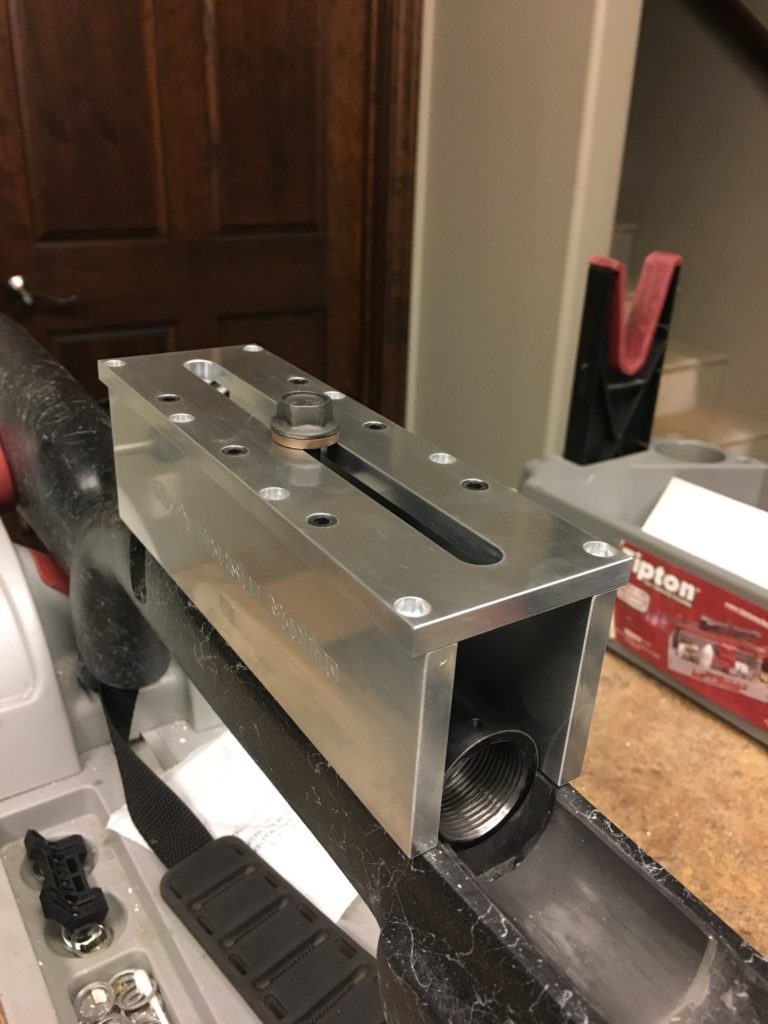
The next is the only commercially available “bedded action puller” that I could find as of the time of this writing. It is built by an outfit called Liberty Precision Machine and is based on the M40 unit, with a feature allowing the puller to be widened to accommodate receivers larger than 1.350″ OD.
Next is a very similar unit just called an “action puller”, that was the source of a D.I.Y. article for RifleShooter.com. It is also seemingly based on the M40 puller design.
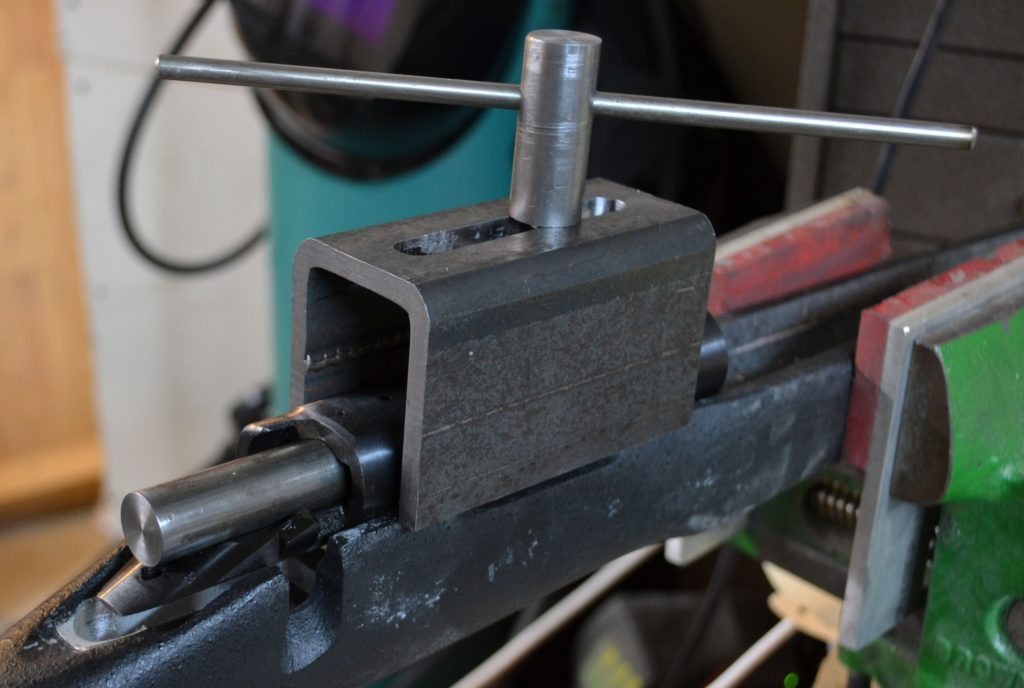
Next is an even more simple puller that is probably no less effective, this one from a post on weldingweb.com. This one also uses a cylinder that sits inside the receiver bore, but without the angled claw of the previous two. While simpler, this design would only work on receivers with an open ejection port design.
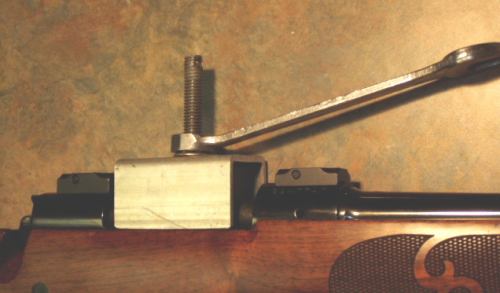
Finally, we have a couple of designs referred to as an “action jack”. These use a modified Picatinny rail or a Picatinny rail adapter to lift a receiver, instead of a rod placed inside the receiver. The first from LongRifles, Inc., and the second from Beanland Custom Rifles.
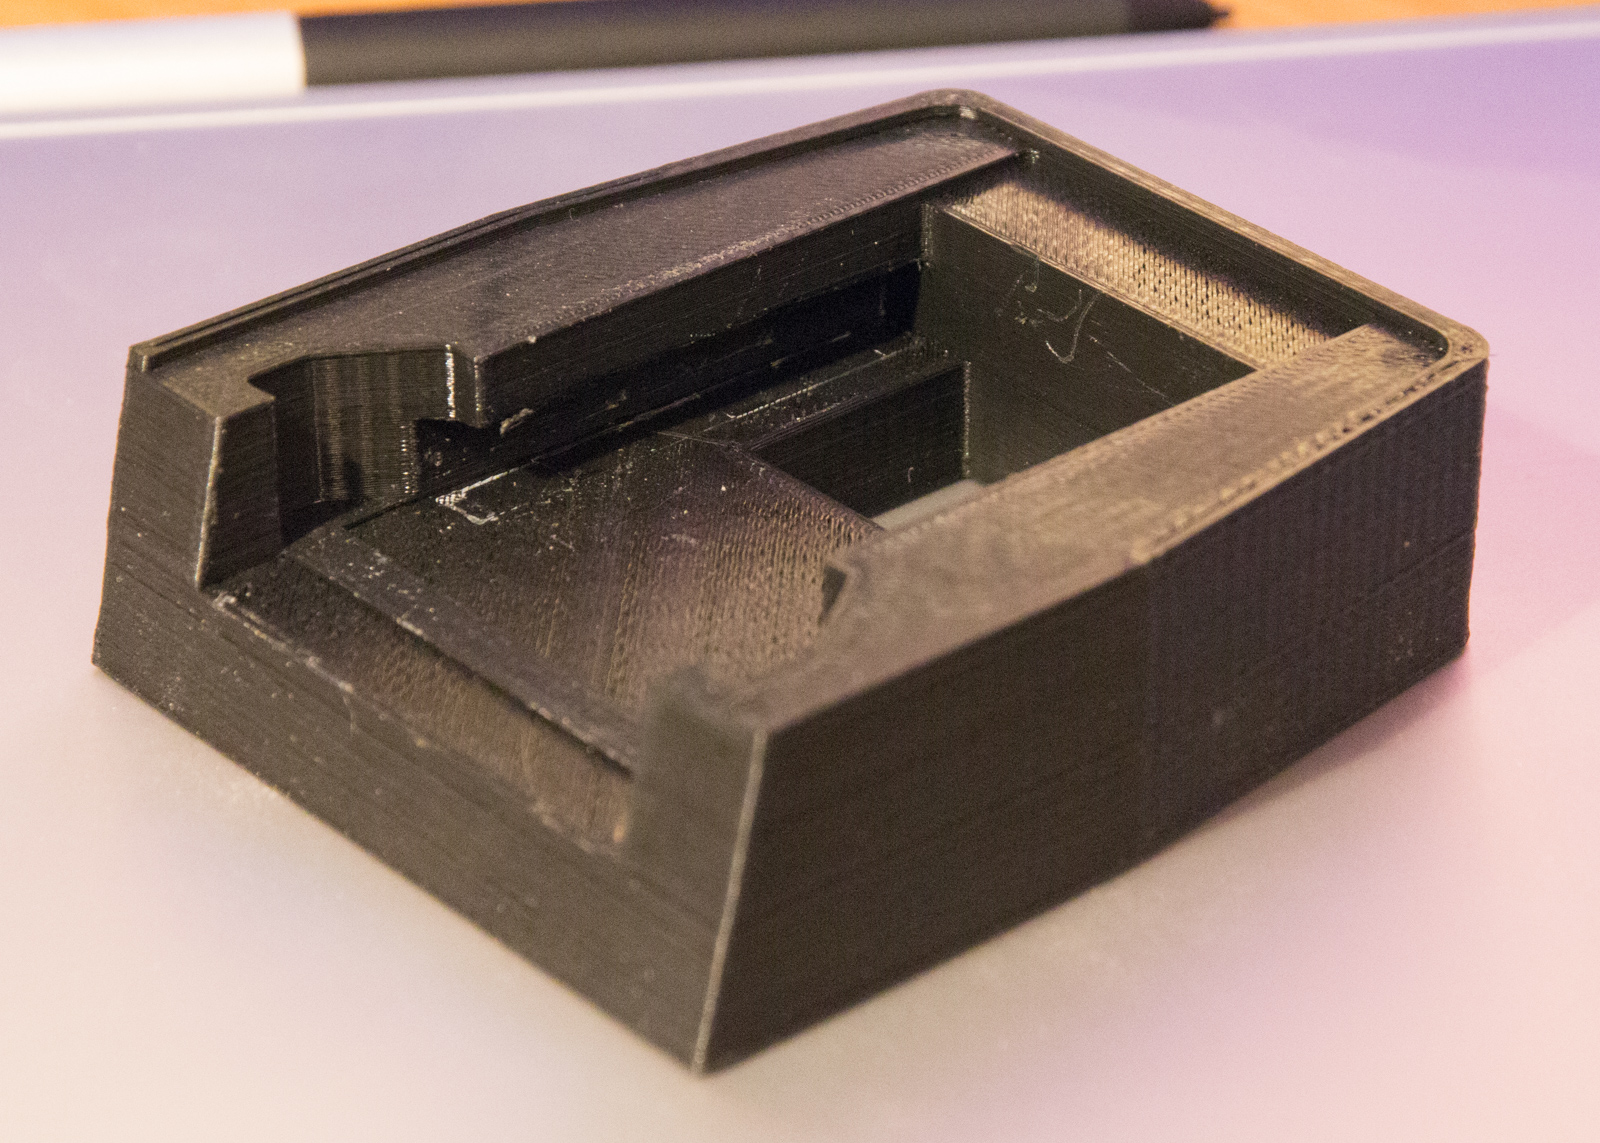
Any of these is a pretty easy project for someone with access to machine tools, and it would be easy enough to cobble something functional together with nothing more than a hacksaw and drill press. But how about another option? With the proliferation of 3d printers, how about a 3d printed “receiver heaver”? It’s probably a better use of that printer you dropped $300 on last Christmas than the 17 different cellphone stands you’ve printed so far.
This is as-yet untested, but I suppose it should work. Feedback / constructive criticism will be incorporated, and I will update this post and the linked files when I try out the design myself.
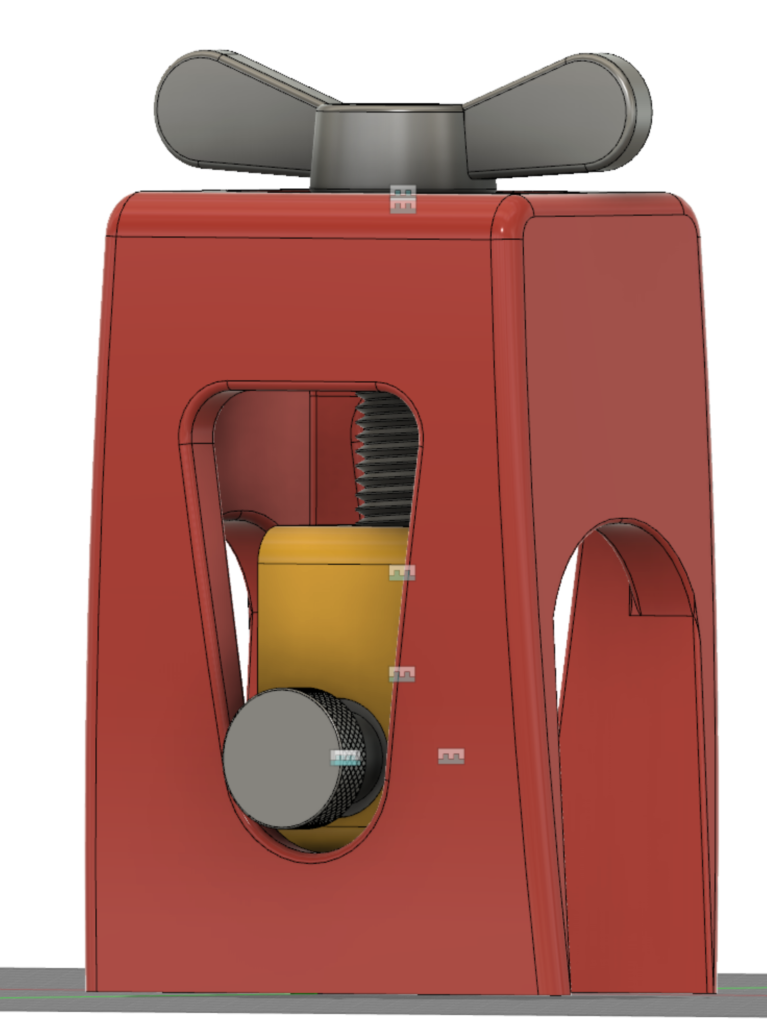
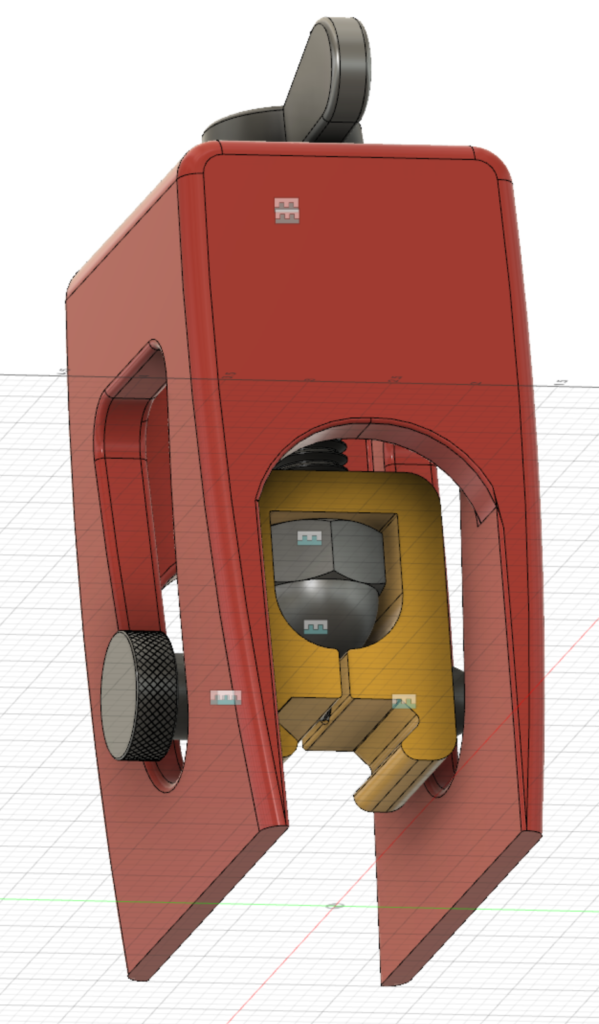
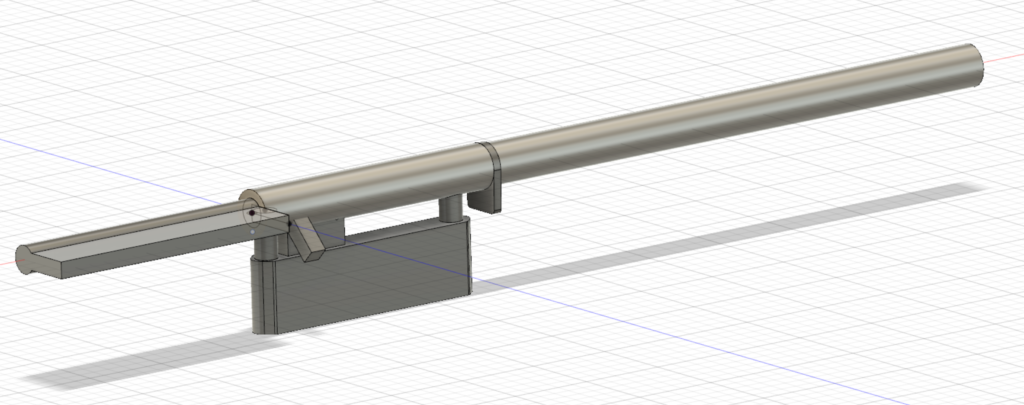
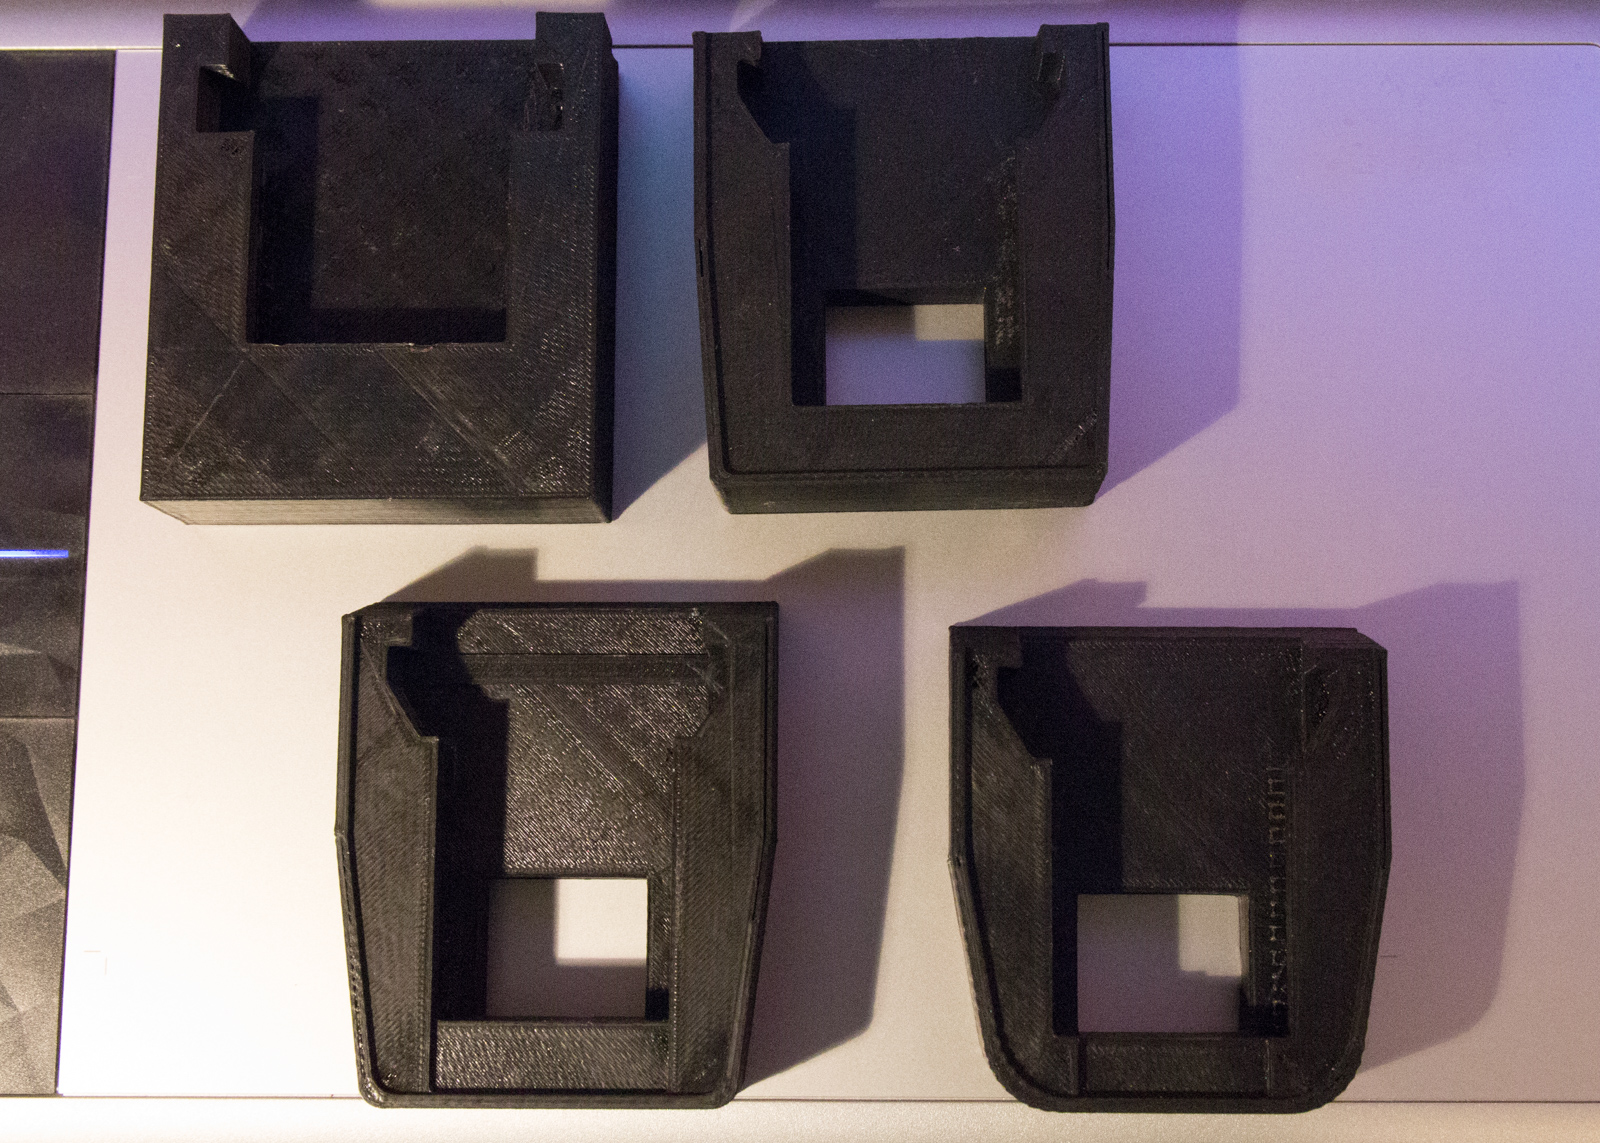
This heaver (puller) is smaller than most of the others you see above, it was intended to be able to fit inside the print volume of a small printer. I would recommend building two and pulling the receiver from directly above or behind the recoil lug. For stubborn removals or to ensure it was pulled perfectly square the second unit could be used toward the rear of the receiver. There is probably enough “flex” in the design to pull a fat body receiver.
The above zip archive contains the Fusion 360 source file (F3Z) as well as STL and STEP files of the two 3d printable parts. A full bill of materials is included for the parts used in the model from McMaster-Carr, although the BOM is pretty fancy-pants and one could be built much more modestly by visiting your local hardware store. Everything is designed around 1/4-20 and 1/2-13 thread sizes.
Print the Picatinny adapter (minor part) on one of the flat sides, and the major part upside down. Again, this is untested. As-is. No warranty. Your mileage may vary. Enjoy.
These parts can also be ordered printed starting from $20-30, check out the Order This Printed option on the Thingiverse listing.
Or, playing with Fusion 360’s Generative Design feature, which is available for free until January 2020!
I spend a fair portion of my every day at the office subtracting material from gun stocks to make receivers, barrels, and bottom metals fit. To be very clear, a firearm is a tool, a tool where the forces involved in the standard operation represent a hazardous condition if things aren’t right. More than that, they are a tool someone may bet life and limb on at some point.
Given the serious nature, and not discounting the fact I many times have 20 minutes to let my mind ponder these things while I watch a machine run, a great deal of thought goes into the forces at play and how my actions affect the structural integrity of the end result.
Autodesk has been spamming me non-stop about a free period of generative design in their Fusion 360 product and I decided it might be fun to validate a few assumptions about rifle stocks and play with Fusion 360 at the same time.
I probably should have spent a little time brushing up on long-forgotten basic physics before I began. Specifically, I should have made sure I had a good recall of the information required to make accurate inputs for the “Structural Loads” portion of the generative design. These loads are how the forces of recoil would be accurately interpreted by the analysis and enable it to generate something resembling an accurate output. I didn’t do that, I just pulled a few things that sounded semi-reasonable out of the air and ran with it. I will have to circle back on this.
For those not familiar with the construction of rifle stocks they are many and varied, but generally speaking, high-end stocks come in two forms outside of injection-molded stocks and “chassis” systems. There are wood stocks, in which the species of wood, the particular cut of wood, grain orientation, and etc. are all very pertinent to the structural integrity of the stock. Laminated wood is a bit different animal. Most of the stocks I deal with day to day, though, are of the composite variety. They are constructed of a fiberglass or carbon fiber shell filled with a “fill” material. The shell on these stocks is exactly what you would expect of a fiberglass or carbon fiber part, they are various layers of cloth material molded into the appropriate shape. Typical shell thickness ranges from 0.025″ to 0.125″, largely depending on fabric type, the brand of stock, location on the stock. This otherwise hollow shell is stuffed full of a combination of epoxy and a variety of other filler materials, most commonly little pieces of chopped or milled fiberglass or silica.
You can clearly distinguish the thin carbon fiber shell, two different types of fill material, and stainless steel pillars in this photo of a Manners elite carbon fiber stock
The assumption typically made is the strength and overall structural integrity of a composite stock is largely in the shell. The fill is typically there to support the various features and accessories, such as the recoil lug area forward of the receiver, sling studs or flush cups attached for carrying, etc. Ok, cool, seems reasonable. Except, when we install a barreled action, bottom metal, and everything else into a stock to make a complete rifle, we tend to gut the thing. The entire top gets hogged out, almost to the edges, for the receiver. Likewise, underneath the receiver, most of the bottom gets hogged out for the bottom metal. Most of what is left of the shell are the two sides of the stock, which doesn’t seem to lend as much structural integrity as one would like… Especially directly rearward of where the recoil gets absorbed into the stock.
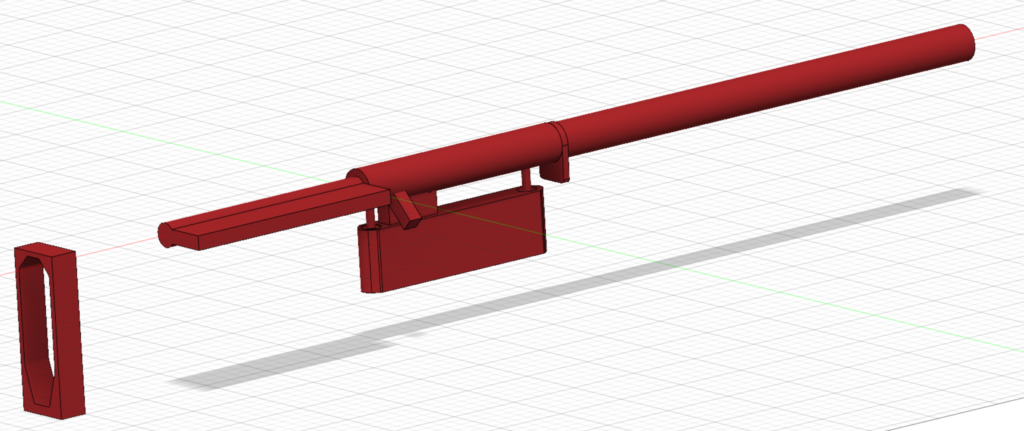
I wasn’t intending to be very scientific, I was just hoping to start getting an idea of how the forces are transmitted through the stock. So here we go — to start, I modeled up an extremely simplistic representation of a barreled action. The bolt and bolt handle was modeled in very simple form both closed and fully open.
Extremely simple barreled action
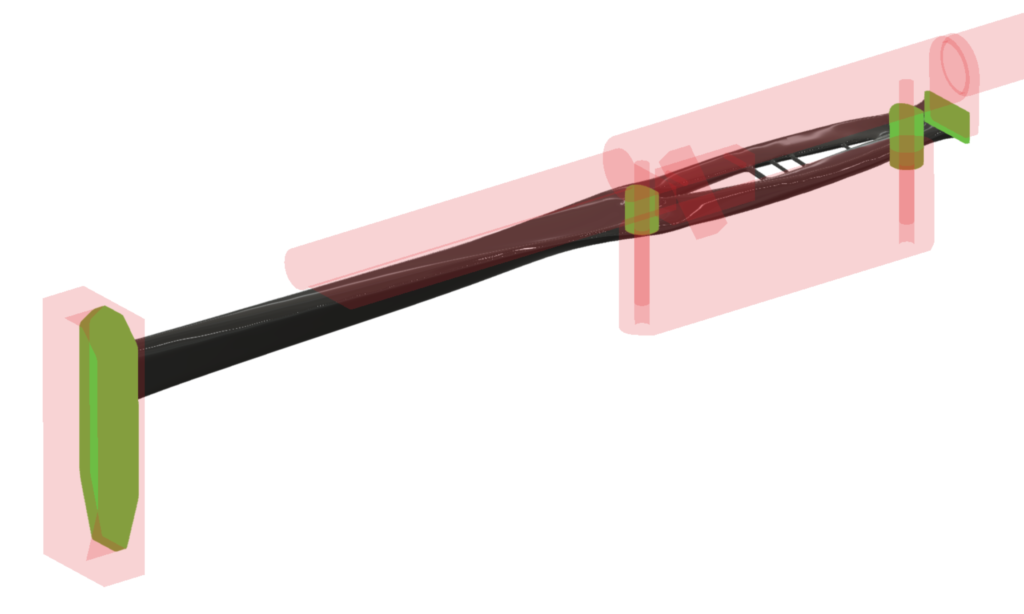
This generative design functionality in Fusion 360 requires 3 major elements. You must define all of your required features, in our case things such as where the recoil lug will transmit force into the stock, and where the recoil pad will attach / where the stock will transmit force into your shoulder. Fusion refers to these features as “Preserve Geometry”. You must also define your “Obstacle Geometry”, these are all the places you don’t want the software to put any material. In our case, we have a receiver, recoil lug, bolt, bolt handle, barrel, bottom metal, trigger, etc. We don’t want the software to create structural elements of our stock that can’t actually exist, because another component of the rifle has to live there.
Fusion 360 Generative Design “Obstacle Geometry”
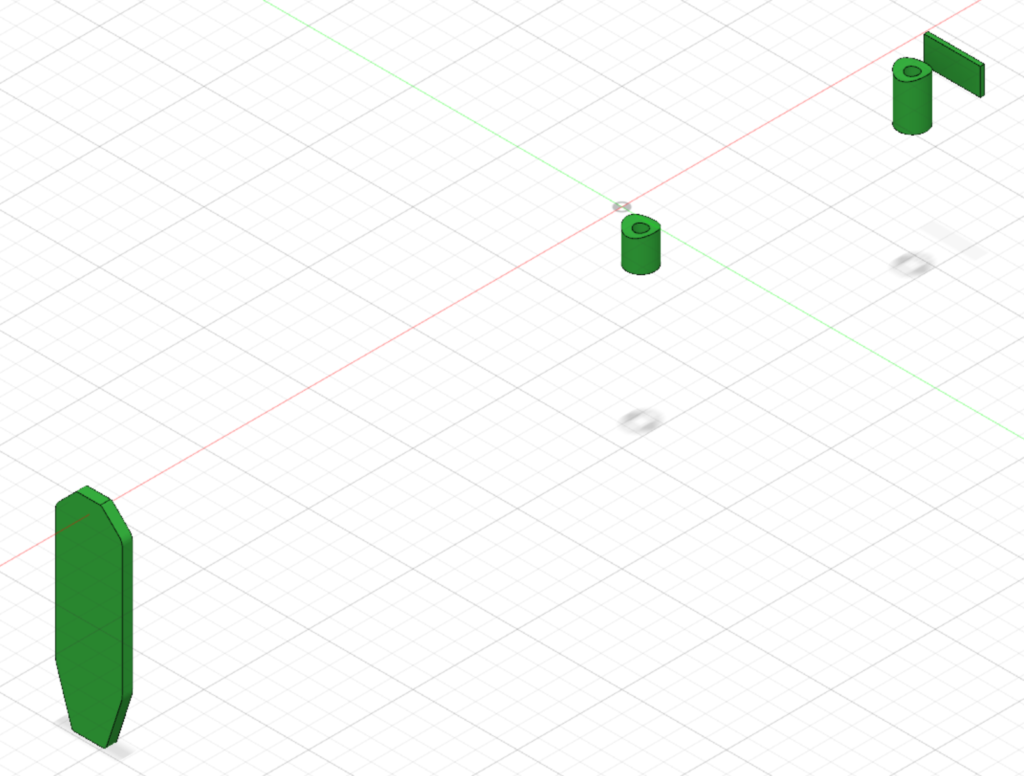
I created only four features the software was asked to preserve, the rear of the recoil lug well, the recoil pad attachment face, and two pillars with lengths typical of an M5 short action DBM.
Fusion 360 Generative Design “Preserve Geometry”
Loads must also be defined. The force of gravity is pre-defined for you by the software, but it can be nuked or modified if necessary. This is probably one of the more critical parts of the whole deal, garbage in – garbage out, as they say. Accurately defining the loads your part/object will be subject to will allow the software to generate a model able to withstand those loads. Not accurately defining these constraints will put you out in left field, guessing — but today I ignored this fact I already knew and think I learned a few things anyway, TBD.
I also ignored any form or fashion of stock “user interface”. In theory, once this design is generated, you could install a barreled action and bottom metal, pull it to your shoulder, and fire it. Doing so would be a bit of a trick, however, as there are zero provisions for actually holding onto this generated stock, nowhere to rest your cheek, none of what makes a stock — well, a stock. A stock really has two jobs, it has to hold onto the receiver and all the other components, and deal with all the forces that happen when fired. The stock also has to serve as a comfortable and intuitive user interface, allowing one to use the firearm effectively. Yes, we are absolutely ignoring that second one, to be continued…
Fusion will also allow you to constrain your simulation to particular materials and production methods. My general sense is the materials are accurately simulated at least for parts that will ultimately be machined, perhaps not created additively, such as with 3d printing. I also have the impression the various options related to how the part will be produced is somewhat hand-wavy. At least in my experience thus far it seems dubious to think you might actually end up with a part you can turn around and produce using this method. You will be money ahead if you simply use it as a means of idea generation.
I ran the generation process with a variety of materials and production methods, but I will only be sharing the results of the CFRP (Carbon Fiber Reinforced Polymer) material. CFRP adequately describes the construction of a composite stock, but considering a stock is a shell with fill I will be taking any output with an additional grain of salt (or in the case of Fusion, adding in some additional “Safety Factor”).
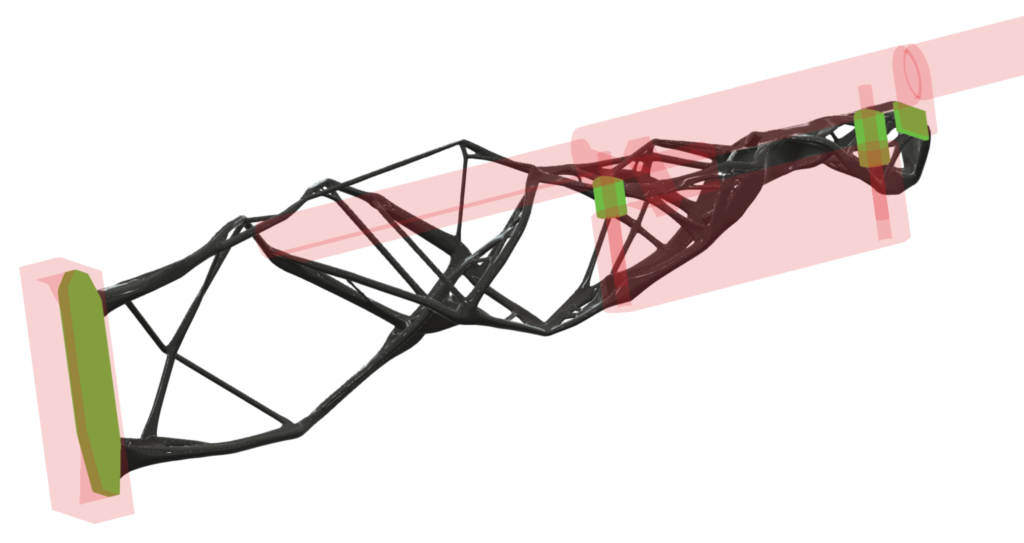
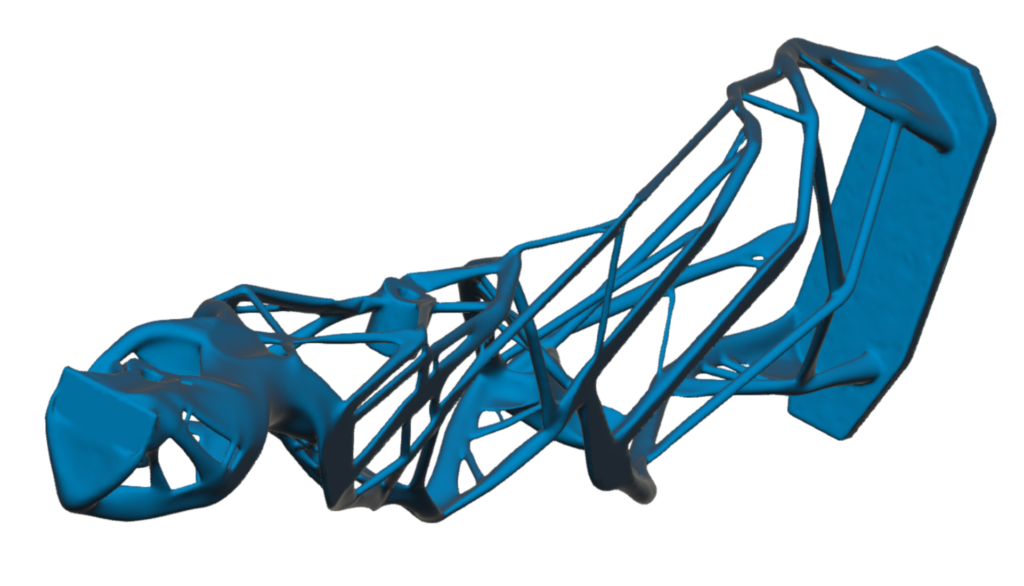
I ultimately ran two different simulations with different loads and settings. One a bit on the side of having this big piece of thing that needs to carry a barreled action around, but doesn’t necessarily need to withstand much recoil. There are a variety of settings related to the design objective at your disposal in this process. For the first simulation, with low recoil loading, it was directed to maximize stiffness at low target weight.
As you can see from the images below, the generative design process resulted in a stock a bit exoskeletal in nature, for lack of a better term. You can imagine this trellis-like structure would result in an overall part that was fairly stiff at a low weight — around 200 grams in this case.
Simulation 1 with Preserve and Obstacle GeometrySimulation 1 rear viewSimulation 1 front view
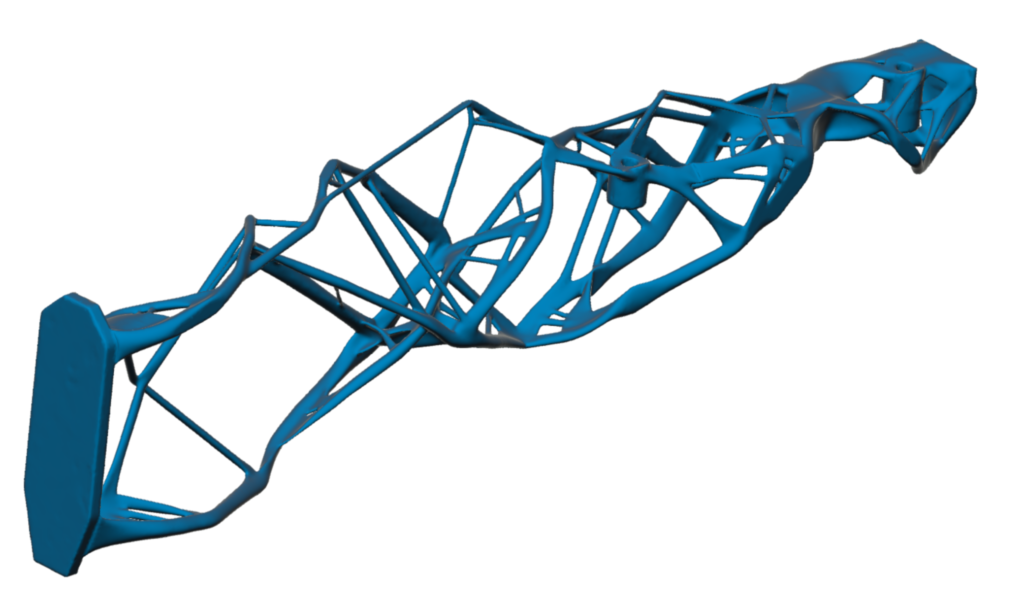
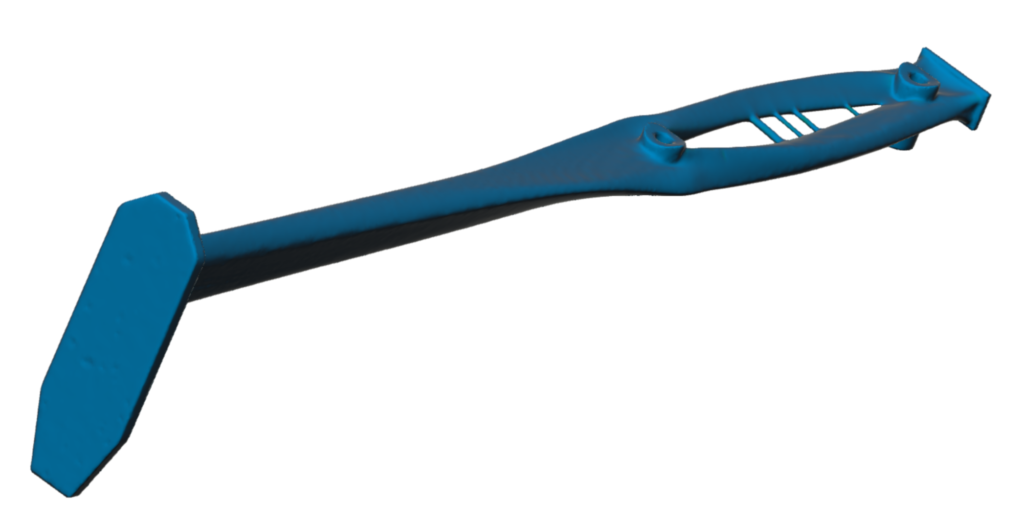
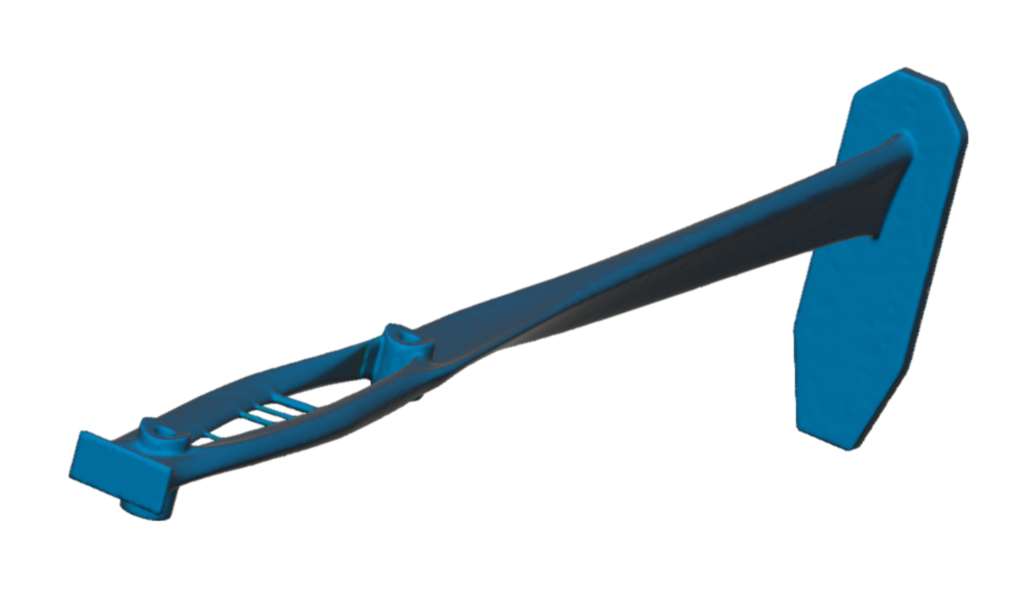
The other simulation was performed as if the stock was going to have to eat a ton of punishment coming through the recoil lug area. The objectives for this simulation were a bit in opposition to the previous one. It was instructed to minimize mass while handling the specified forces, with a defined safety factor.
As you can see in the following images of the result, this design was very simple and architectural. The generative process resulted in what looks to be as close as it could come to a linear beam between the lug face and the recoil pad. This thing would very likely eat recoil quite well, but might also be a bit of a wet noodle to handle — but also at around 200 grams.
Simulation 2 with Preserve and Obstacle GeometrySimulation 2 rear viewSimulation 2 front view
What’s the take-away? I have some thoughts, but I’m not sure these particular simulations spell out any sort of improved stock design on their own. You can grab my working file below if playing with this sounds like a lovely way to spend an afternoon!
After a bit more time playing with generative design, it might be fun to bring things full circle by modeling a good representation of a “real” stock and playing with Fusion 360’s simulation tools. It would be interesting to see, with different material types applied, what manner of interaction there is between the shell and the fill material.
To be continued, just so long as I don’t get distracted by too many shiny objects.
So who to actually build this thing? I wasn’t going to be running chamber reamers on a drill press or thread the muzzle with a hardware store die set. I might stoop so low as to Krylon a stock, but not on this rifle… definitely not on this one. There was only one choice, it had to be LRI-built. Half high-end gunsmithing shop and half machine shop, they bring the weird and impossible to life… and they’re local.
I decided to go with barrels made nearby in Rapid City, SD by K&P Gun Company. These barrels are well priced, match grade, cut-rifled, and made of 416R stainless. They didn’t need to be all that, I liked that they are manufactured effectively just down the road. The fact they are some of the finest traditional match grade barrels made certainly does not hurt, though. I got these barrels in a varmint contour, which is a bit on the heavy side, but I rationalized that a few different ways: they would be fluted to take a bit of weight off, they would handle trips to the local prairie dog town well, they would leave plenty of meat to support the 5/8-24 threads and suppressor, and the weight would moderate recoil a bit. I had both barrels finished at 19″ so the rifle with 7″ of suppressor would handle somewhat like a rifle with a typical 26″ barrel. Finishing these at 19″ also took quite a bit of weight off. I figured they would be approximately the same weight as a 26″ #5 contour barrel once they had been shortened, and the fluting would lighten them further to about the weight of a 26″ #4 contour. This should lead to a rifle that carried about like one of the modern sporting rifles (Bergara, Howa, etc) which have a #5.5-6 contour barrel once the suppressor was installed.
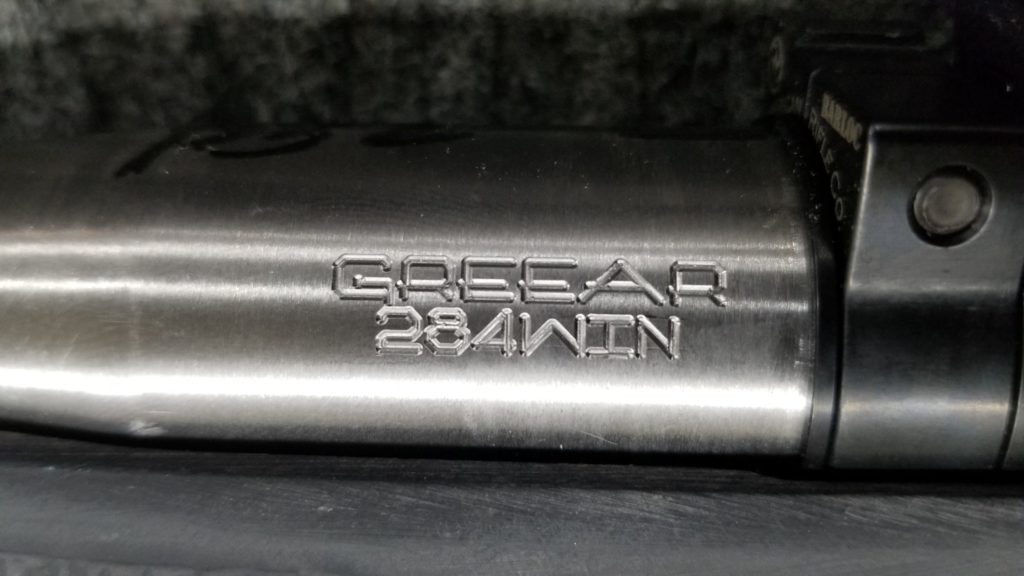
A variety of custom touches were added, such as engraving on the barrels.
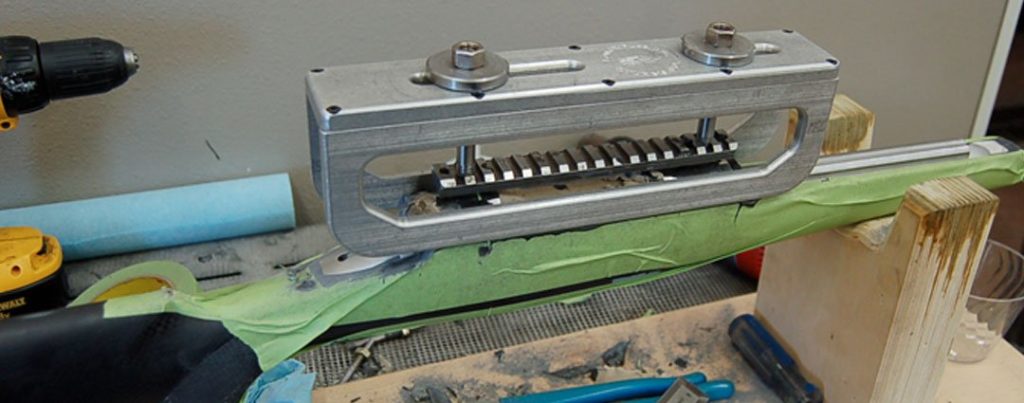
I had the McMillan stock bedded using LRI’s pillar bedding process, where the receiver is mated to the stock by a layer of epoxy 0.05″ thick. The receiver is dunked into the stock that has had an oversized receiver-shaped bathtub carved into it, and that void filled with epoxy resin. After curing, the receiver is popped back out, and all the various ports are milled through the epoxy. This is a fairly different process than typical bedding, where the complete inlet is done first and a thin skim of epoxy is used to mate the receiver. It’s tough to control the epoxy, so the traditional method typically ends up looking pretty messy when you pull the receiver out, whereas the LRI method looks like art.
The ARC Nucleus being pillar bedded in the McMillan HTG
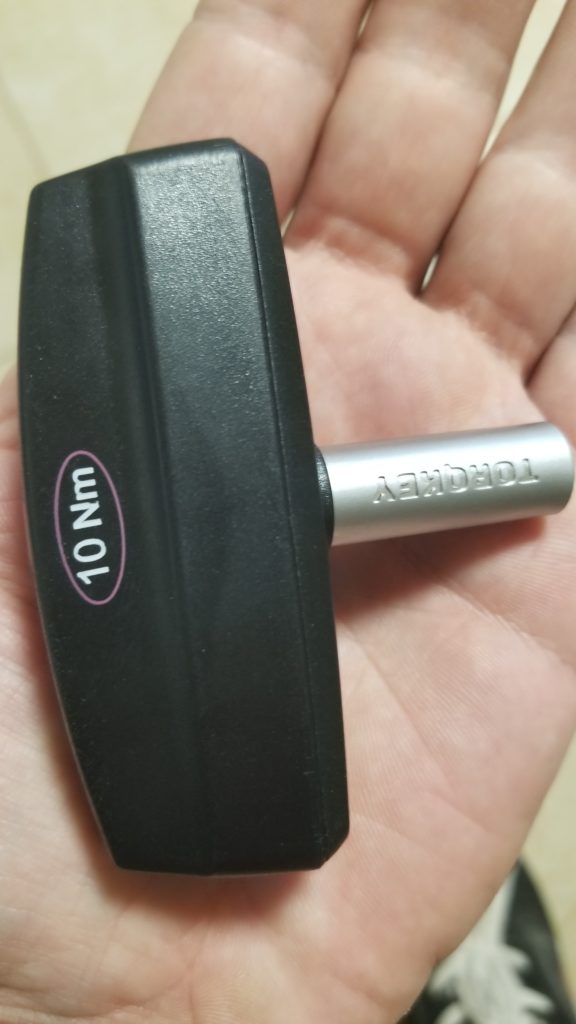
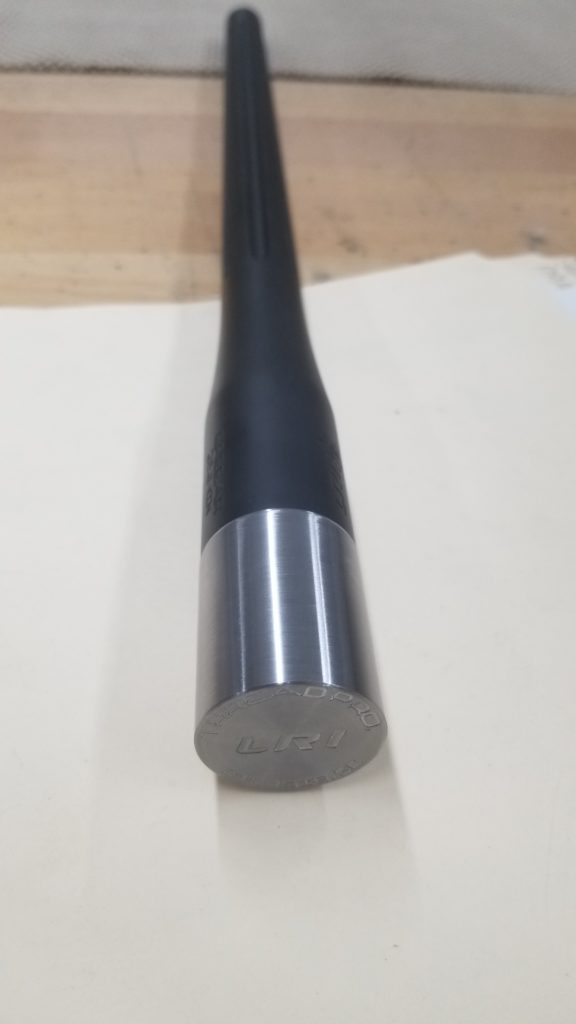
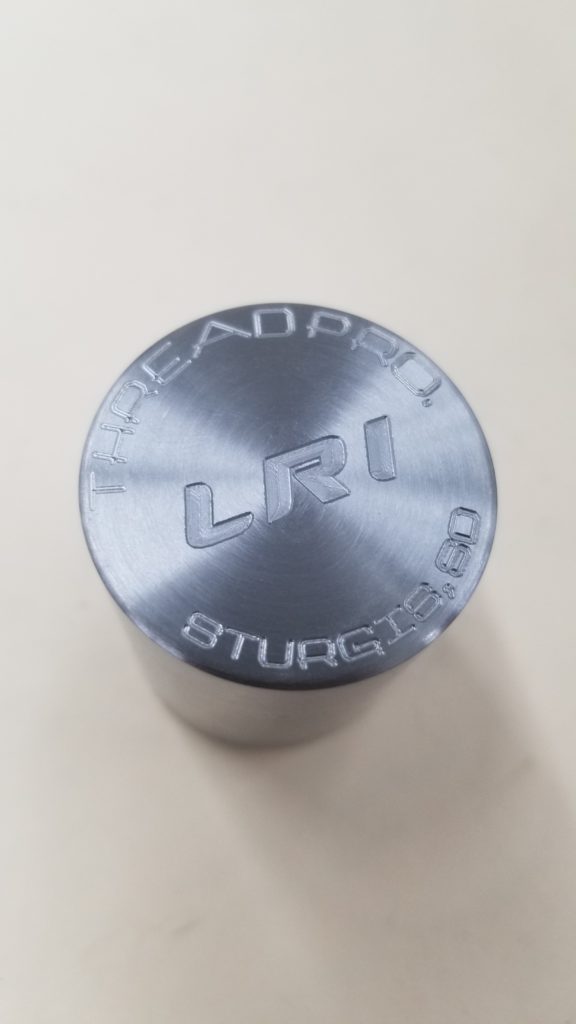
To take a bit of the guesswork out of swapping barrels I tracked down a torque wrench just for the application. The barrels both had one of LRI’s contour-matched thread protectors on the muzzle, but this rifle was a bit different… with two barrels one of them would need to be wearing a thread protector on the other end. A custom tenon “Thread Pro” was in order.
Torqkey for Barloc installation
Tenon thread protector installed
Tenon thread protector engraving
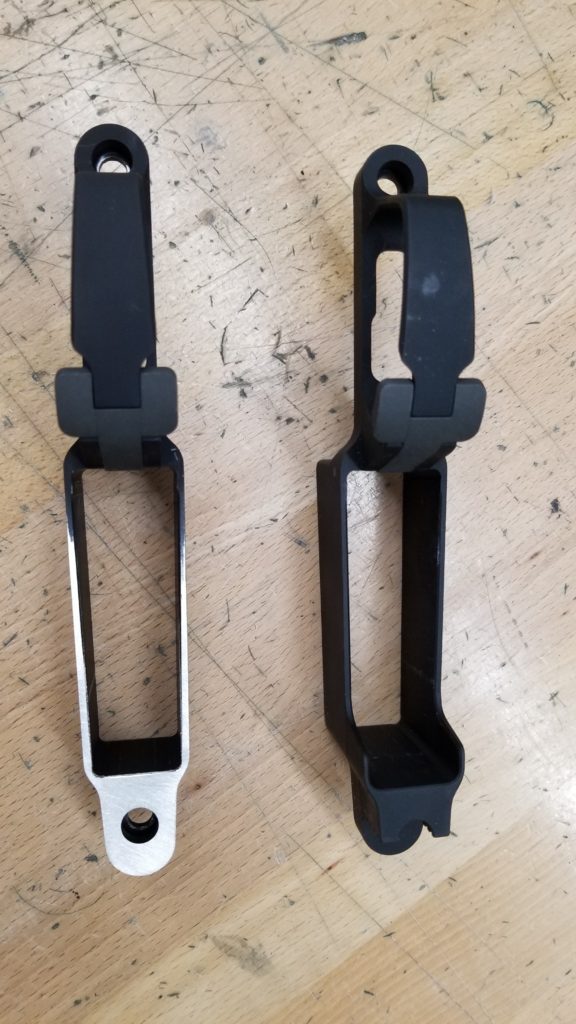
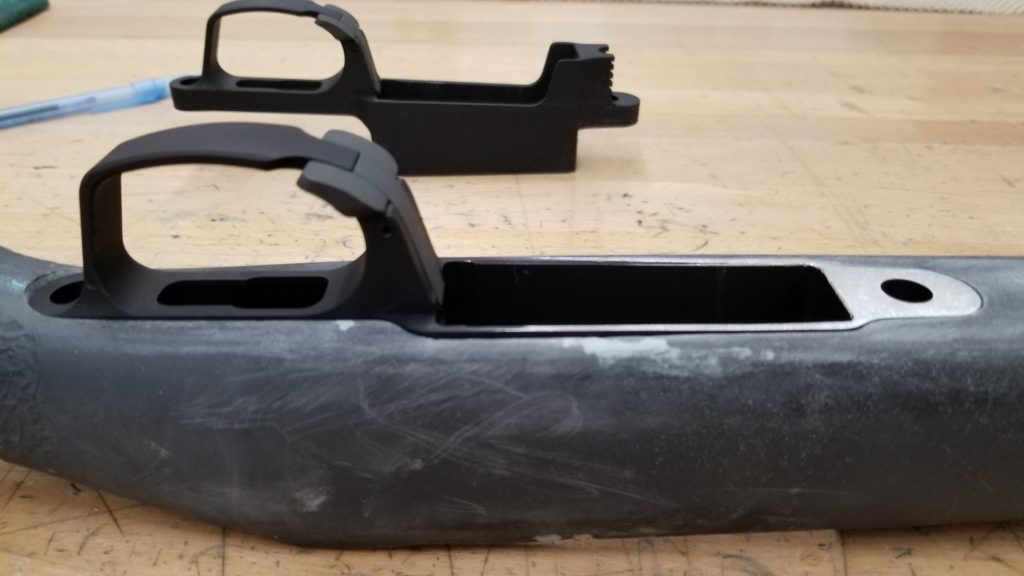
The bottom metal was a choice I thought should have been easy but really wasn’t. My dad has big hands and needs something a bit more “tactical” to work well with his physiology. The problem with this is that most of the bottom metals in this vein either have a huge magazine catch lever that would catch on everything while being packed in a hunting situation, or they have features a bit silly for a hunting / all-around rifle, like barricade stops. I eventually settled on a Badger M5 footprint enhanced DBM. The Badger has the magazine release integrated into the trigger guard but does so in such a way the paddles are still easy to push with gloved hands (or very large fingers). The barricade stop would have to be milled off prior to assembly.
Easy stuff, just mill that barricade stop right off of there…
I decided on a two-stage trigger for no other reason than I have a preference for them, especially in an all-around firearm that will be used for hunting. There is a bit of a lack of good two-stage triggers for Remington footprint rifle actions, and I settled on the newly-released Geissele Super 700. I have used and liked Geissele triggers in AR-platform rifles and liked them quite a lot, fingers crossed.
That led me to magazines. Because the bodies of the two different cartridges are significantly different in diameter (even though the case head is the same size) they would need to be fed from different magazines. I guess I should clarify that… it is definitely possible they both could have been set up to feed from a common, shared, magazine but the 243’s would have sat much higher and caught a lot more of the bolt face during feeding than the 284’s. Ensuring 100% reliable feeding the first time, every time, meant setting up magazines for each round. In a perfect world, your action and bottom metal magazine catch are the right distance from each other so when the magazine registers against the catch the bolt pushes against just the right amount of case as it comes forward to feed reliably without rubbing on the magazine feed lips. The 243’s feed well from unmodified factory magazines. The 284’s will feed, but ultimately the magazines were modified by opening up the feed lips slightly to ensure reliable feeding over the long haul.
I decided on a pair of Accuracy International 5-round magazines for the 284. These magazines hold 4 of the larger-diameter 284 rounds. I figured 4 was perfectly adequate for what would likely be used on hunts for larger game. This magazine was also fairly low profile, which would be beneficial when packing the rifle. The binder plates at the nose of these magazines were removed and replaced with a soldered-in steel plug. This was to ensure the hand loaded 284 rounds could be loaded out a bit longer to really take advantage of the larger case capacity the 284 offers.
For the 243, I settled on a pair of American Rifle Company’s double-stack center-feed magazines. These magazines are a bit taller than the 5-round magazines, but not so much taller as to be problematic. To ensure reliable feeding of these magazines they were equipped with LongRifles, Inc. aluminum followers. The 10-round capacity of the magazines intended for the 243 seemed appropriate, as these may be used for the occasional target shooting or varmint session.
Down to the details, rings, bipod, sling, paint… American Rifle Company makes amazing actions, they also make great scope rings. Choosing them was a no-brainer. For the bipod, I chose a 9-13″ Harris with the swivel and leg detents. The Harris is classic, functional and lightweight, hard to beat. For the sling, I decided synthetic material would be the best match, and an easily adjustable but fairly traditional sling would be the best match. I settled on a hunting sling from Viking Tactics.
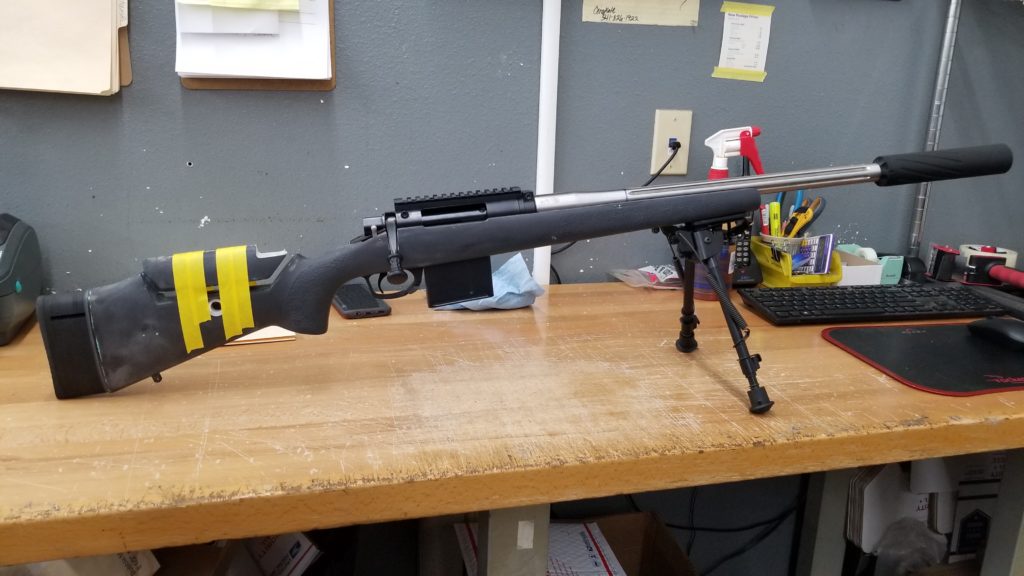
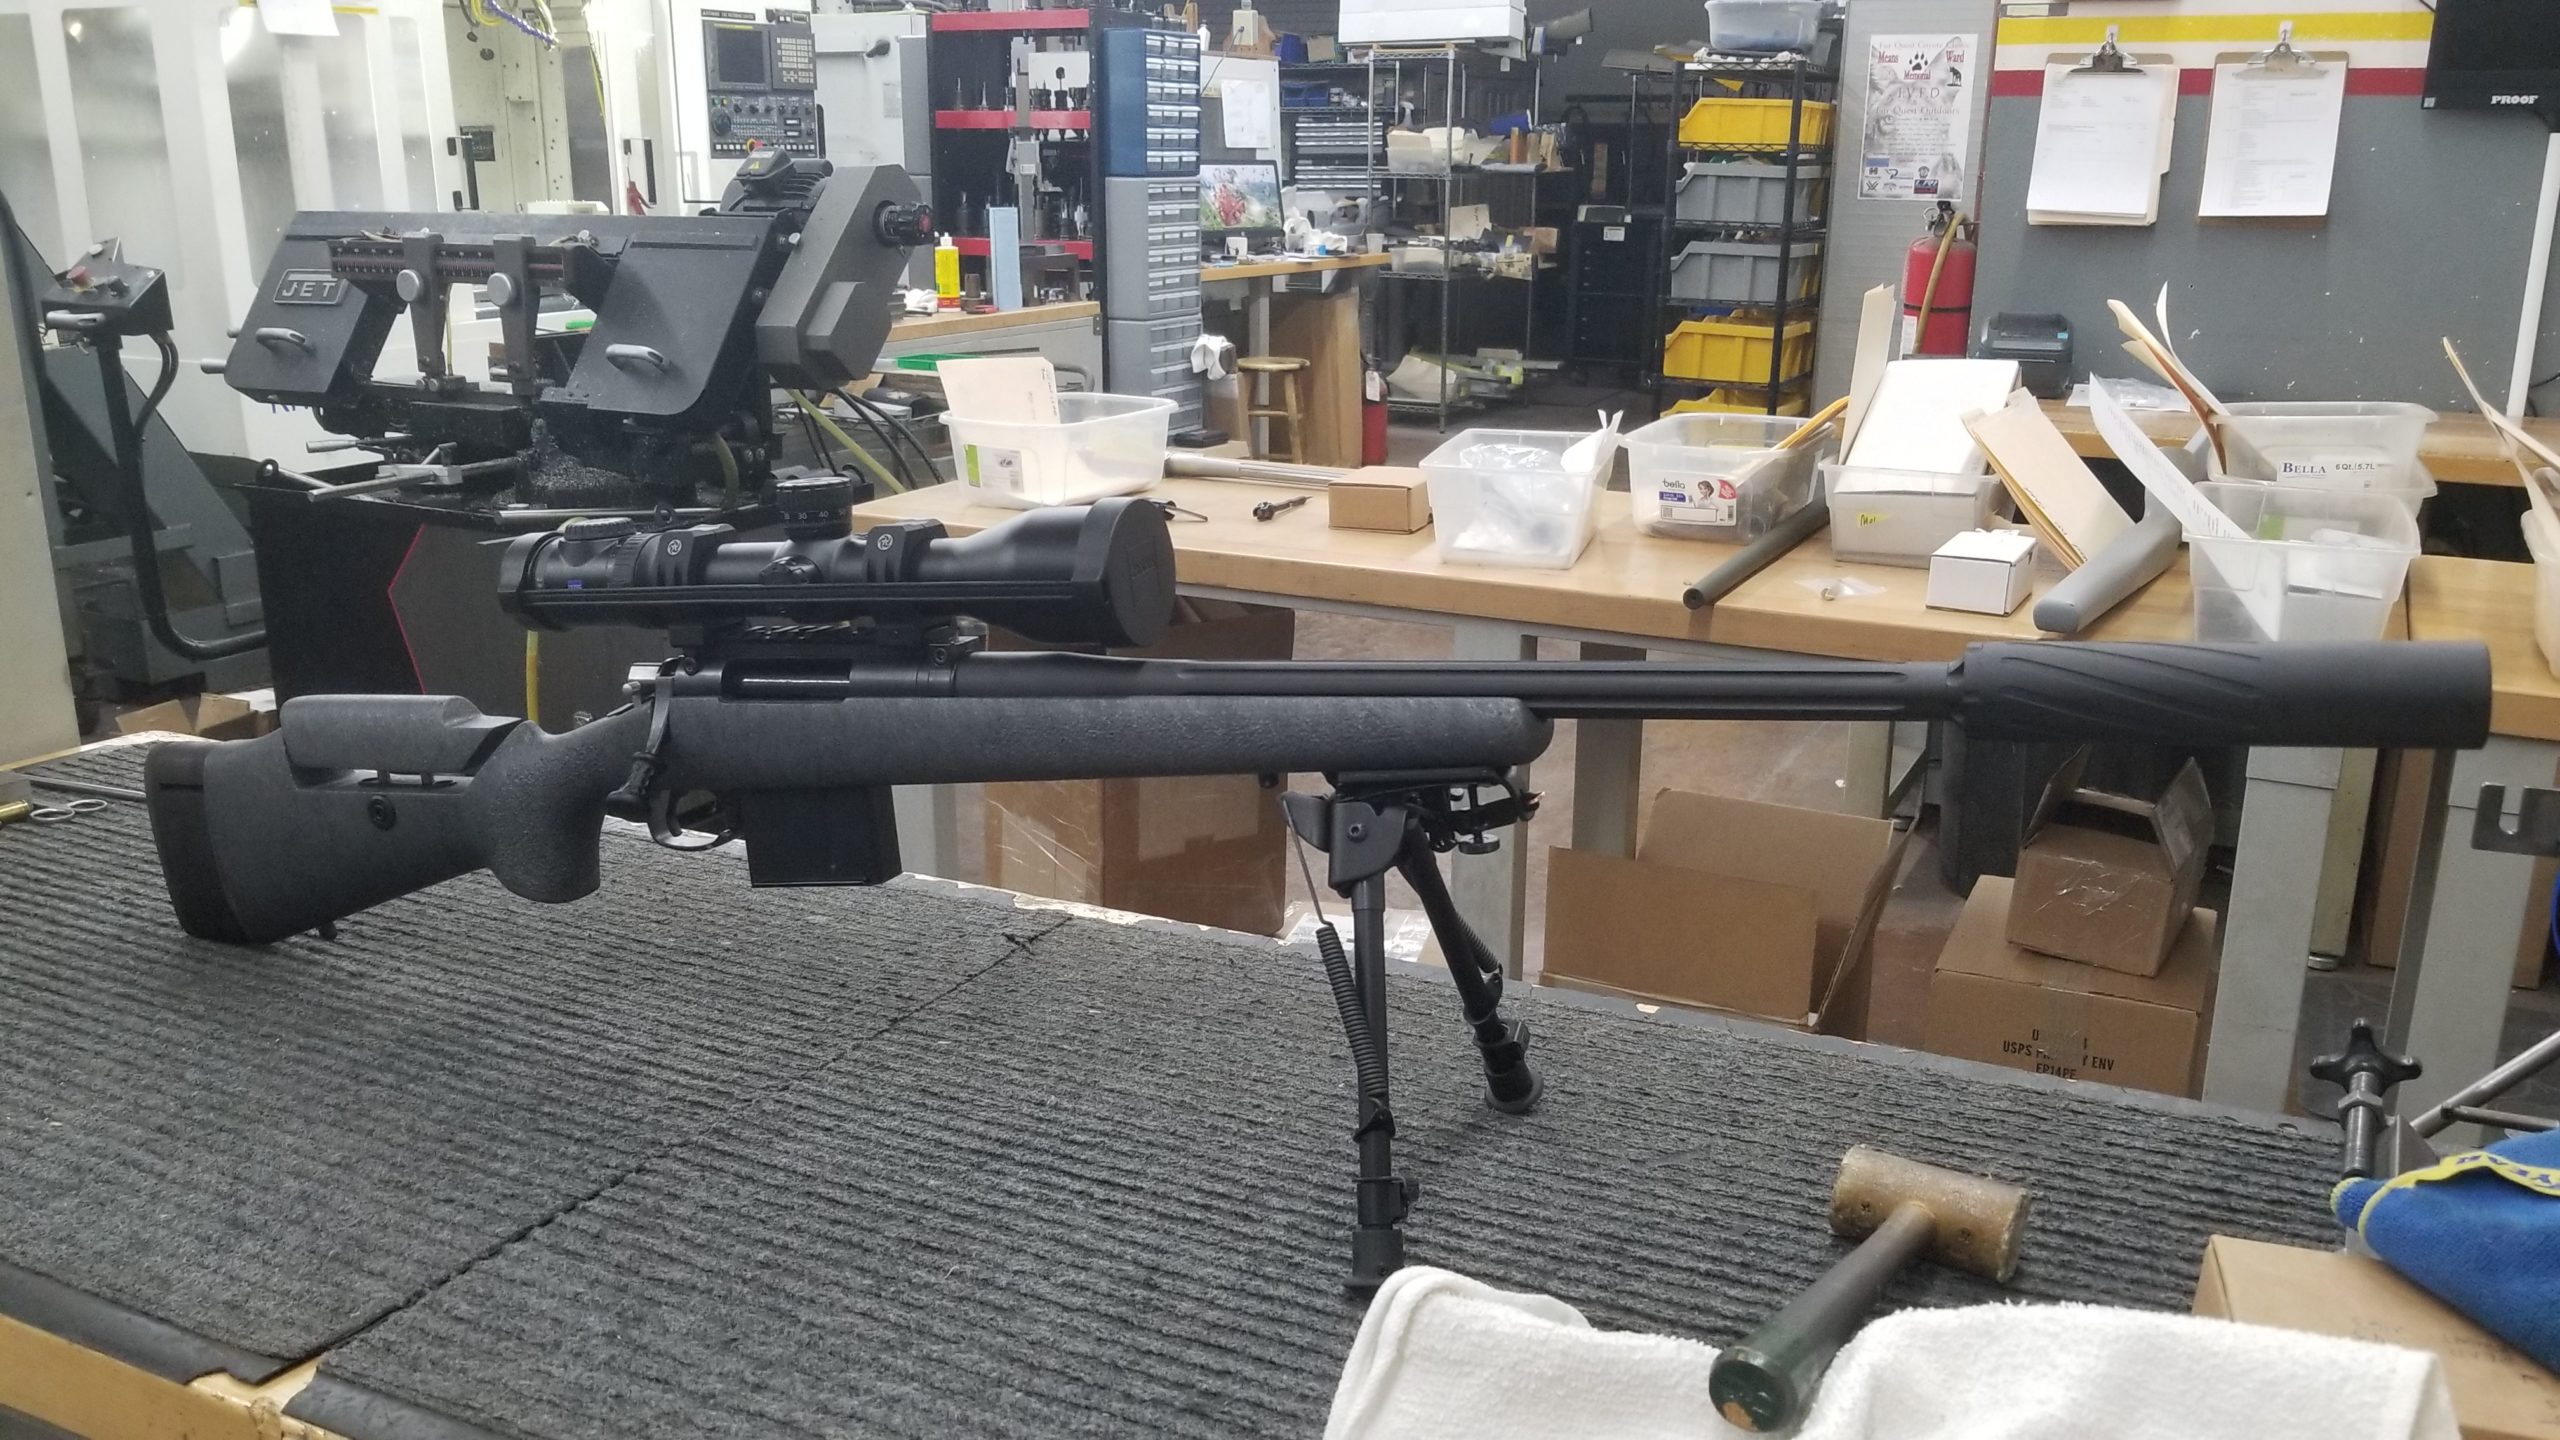
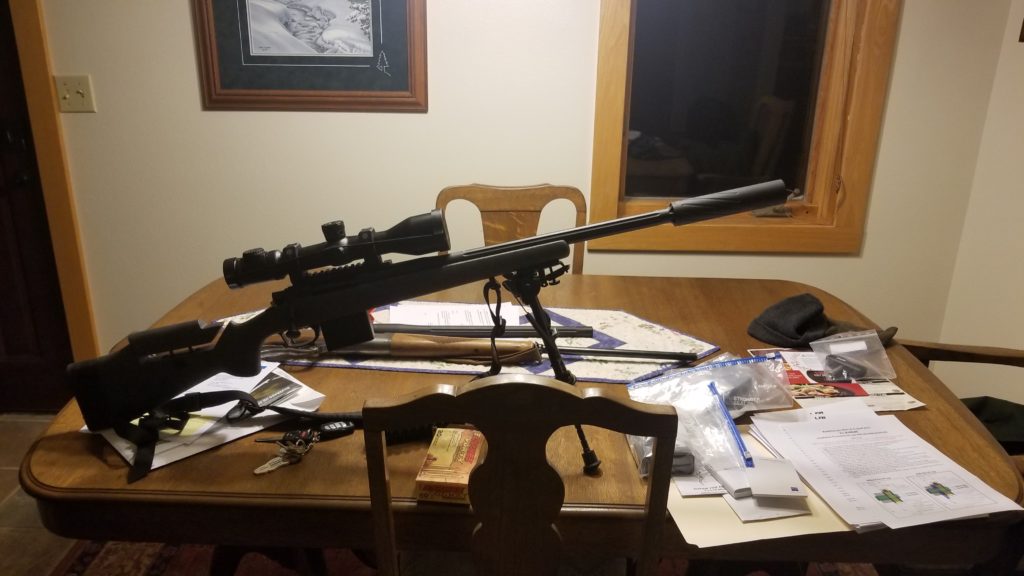
Final test assembly before painting.
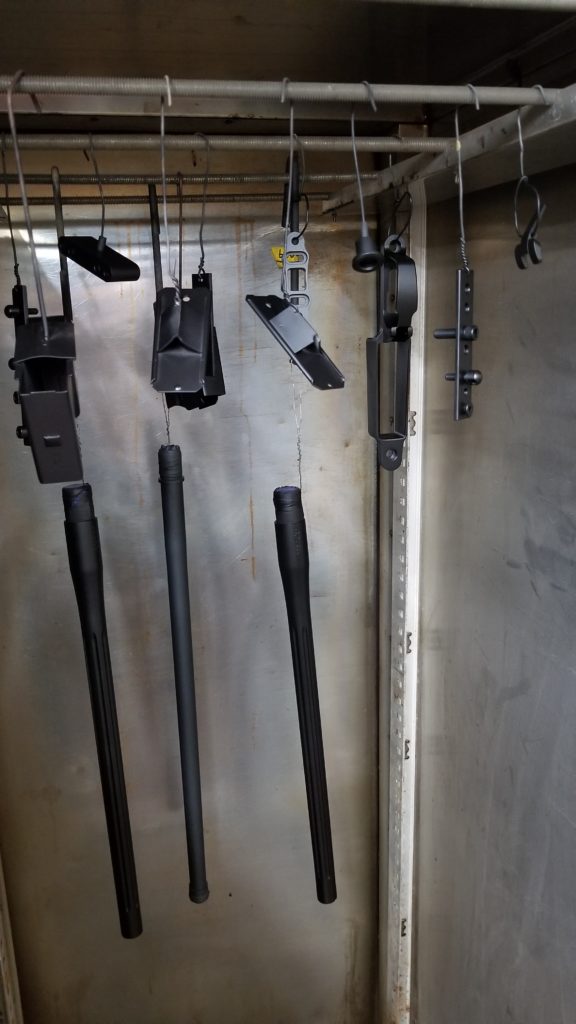
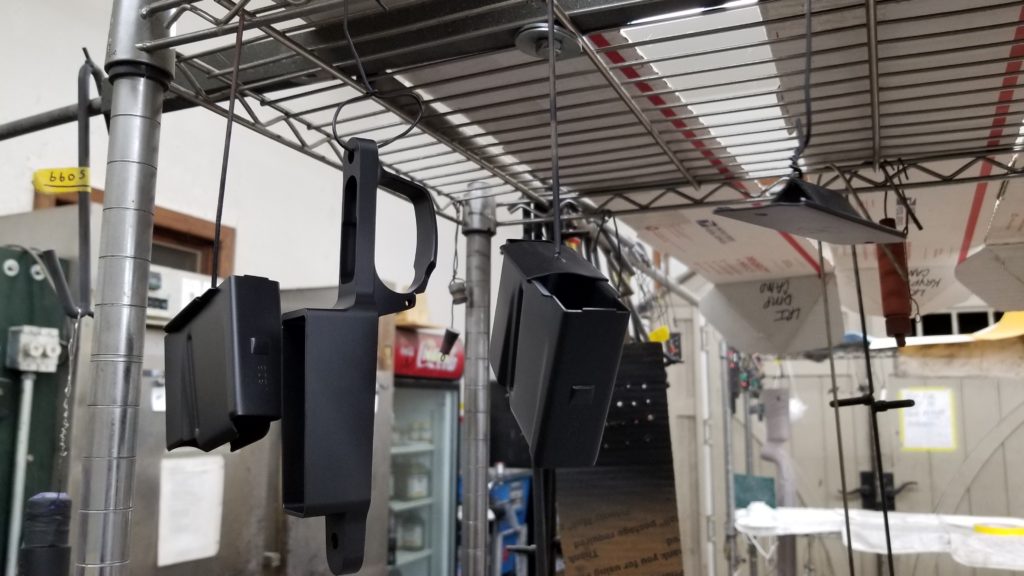
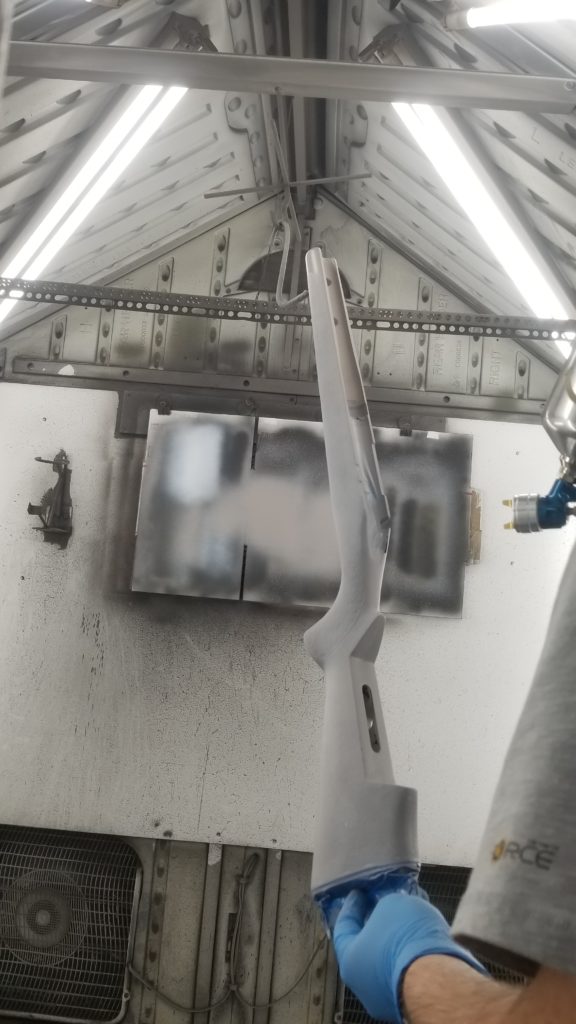
The paint was a matter of much deliberation. The stock and metal were to be Cerakoted at the end of the build by LRI, who have the capability in-house to do almost anything from mild to wild. When looking at some of the amazing stencil work they regularly publish online, it can be a bit hard to reign oneself in and remember… this isn’t my rifle, what would my dad really like? In the end, I settled on a grey theme, with the stock coated with Sniper Grey with dual webbing colors on top in Graphite Black and Stainless Steel. All of the metalwork was finished in Graphite Black sans the action and bolt, which were left in their factory black carburized finish.
Graphite black on all the metal
The two AI magazines had to be sprayed after removing the binder plates
Light coat of primer
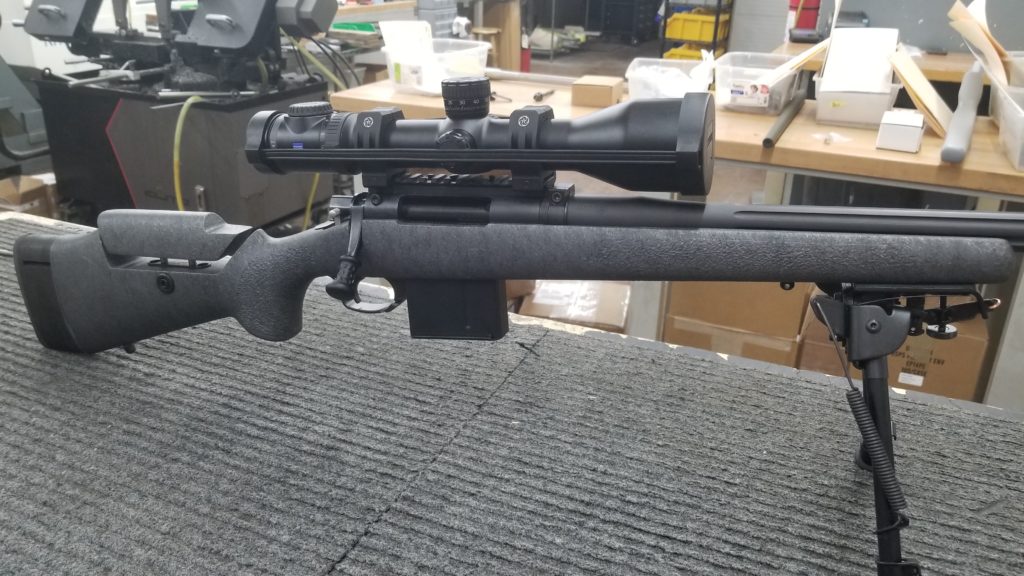
Finished product up close
Finally fully assembled, and just in time. This build was wrapped up on December 21, 2018. (Yes, it took me almost year to post these details).
Ready for Christmas morning.
Putting together something very custom has a way of spiraling out of control, but that can be enjoyable too — just so long as you don’t do it every day. As nice as it looks I sure hope my dad treats it like the tool it is.
I am not much of a gift giver and I don’t remember ever having been (as an adult at least). I think that’s largely because I’m not much of a gift getter. I generally know what I want, have prioritized those things that are important to me, and work to make that happen. So I have everything I need, and almost everything I want. Anything I might want but don’t have that can be purchased … well, if I don’t have it already, that’s probably because it’s expensive. By expensive, I mean unreasonable to gift. At this point everything on my personal list of wants costs at least as much as a decent used car. My personal wishlist probably wouldn’t make a great Amazon Wishlist to circulate to my friends and family. Totally unreasonable.
I think I get this gift aversion from my Dad. For as long as I can remember he has instilled in me the virtues of only having to buy something one time. I always remember him being very particular about what material things he chose to spend his hard-earned money on. It had to be the right brand and have the right features. It had to have a reputation for durability and availability of good service or warranty. What it didn’t need to be was any particular color, or cheap. My dad also has everything he needs, and most everything he wants. How do you reasonably buy a person like that a gift?
As an aside, before I tell you about the unreasonable gift I gave my father, I will tell you how you can make the holidays and birthdays work for people who seem to have everything. It’s very simple, people who are particular about what they own are also particular about what they consume. Consume we do, however! Pay attention to the things we use as a consumable, maybe it’s drill bits, coffee, wine or beer, or a very particular variety of toilet paper. It doesn’t matter, we will appreciate the gift and we will appreciate the thought, especially since you noticed our high standards in whatever the consumable might be. I would be absolutely elated to receive a case of Charmin Ultra Strong Double Rolls with a nice note for the holidays. Or drill bits.
It’s festive right there in its own packaging, no need to wrap or even add a bow.
I have known my father long enough to have learned a few things about him apart from his ability to be impossible to buy gifts for. He enjoys doing things outside, enjoys hunting, enjoys the solitude hunting entails, enjoys the planning, and enjoys the bounty it can reap. He doesn’t necessarily love firearms. He grew up with them, is comfortable around them, but he doesn’t embrace them the way many from the midwest who grew up hunting do. He doesn’t like the recoil, he doesn’t like the noise, he doesn’t like headache-inducing muzzle blast.
My fathers favorite tool is usually a bit traditional, heavy, and hard to hurt. If we’re moving dirt together he will naturally tend to pick up the biggest mattock, and take nice slow swings, letting the tool do the work. If we’re felling trees together his preferred tool will be in the 70-80cc class, and he’ll never complain about hauling around the bit of extra weight that entails… he’s happy to have enough saw when he puts it into the tree.
My father is also actively trying to reduce his footprint on this earth. Having spent his adult life maintaining dozens of engines on everything from saws, to mowers, to log splitters, multiple vehicles, multiple trailers, tractors, he prefers nowadays a bit of consolidation. He is the target market Miller and Lincoln are going after with the new multi-process, multi-voltage welders on the market. Why own, store, and maintain three welders when you can have one?
I started this rifle build with a set of rough specifications. It was to be suppressed from the start as a suppressor helps moderate much of what my dad doesn’t enjoy about firearms. It should be multi-caliber capable, so it can work as well on varmints and deer as on moose and elk. It need not be a complete lightweight but should be light enough to be fielded for a half day. It should pack and carry as well as a typical rifle with a 26″ barrel. It should have a larger for-end, length of pull, and trigger guard to accommodate my dad’s long arms and large hands. It should be easy to switch between calibers, both the actual barrel swap and the dope.
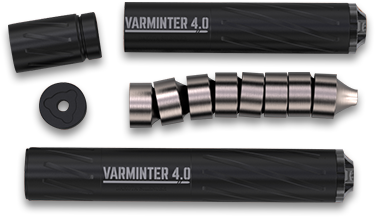
The rough concept and bullet points were written down toward the end of 2017. Not knowing for sure yet what caliber(s) it would be chambered in, I decided on a 30 caliber suppressor with the common 5/8-24 thread. I also decided a Titanium suppressor would be the best choice. Weight was not the primary concern with the build overall, but it made sense to limit the amount of weight hanging out at the end of the barrel. Of all the suppressors on the market, I narrowed it down to a couple of manufacturers. It would either be a Thunderbeast ULTRA-series manufactured in Cheyenne, WY, or a Dakota Silencer Varminter manufactured in Sturgis, SD. Both hit my goals for weight, construction, and sound reduction. I was leaning toward a 9″, and originally ordered the Varminter 3.0 for no other reason than they are manufactured closer to home. By the time I had my paperwork in, the Varminter 4.0 which could be run as a 7″ or 9″ suppressor was on the market and that is what I ended up with.
Based on the decision to run a 9″ suppressor the rest of the rifle needed to be short to be able to pack the whole package around, in and out of vehicles, or through the woods. I decided it needed to be based on a short action, and that there were plenty of big game capable short action cartridges available to make the package work. I was originally planning to build the rifle around an American Rifle Company Mausingfield action. Having seen these actions in person alongside numerous other tuned up and custom actions, there really just wasn’t anything else that could hold a candle to it. The Mausingfield is really just as good as it gets and the only negative thing anyone can say about it is that, well… it’s expensive. About the time I was ready to order the action, in early 2018 the American Rifle Company Nucleus was announced. The Nucleus retained many of the amazing combinations of features making the Mausingfield top-tier while adding some great additional features and reducing the price. Around the time the Nucleus was announced American Rifle Company also announced what they call the Barloc. This device makes it possible to quickly and fairly easily change barrels. It removes the need for a barrel vice, action wrench or any other special wrench such as for a Savage-style barrel nut. It even eliminated the need for a headspace gauge. If the barrel is re-installed to the same position, or with the same amount of torque, prior to tightening the Barloc, the headspace will be consistent every time the barrel is removed and put back on. Perfect. The Nucleus with a Barloc it is, and they were available at a discounted price at the time.
American Rifle Company receiver with Barloc. Simple physics at its finest.
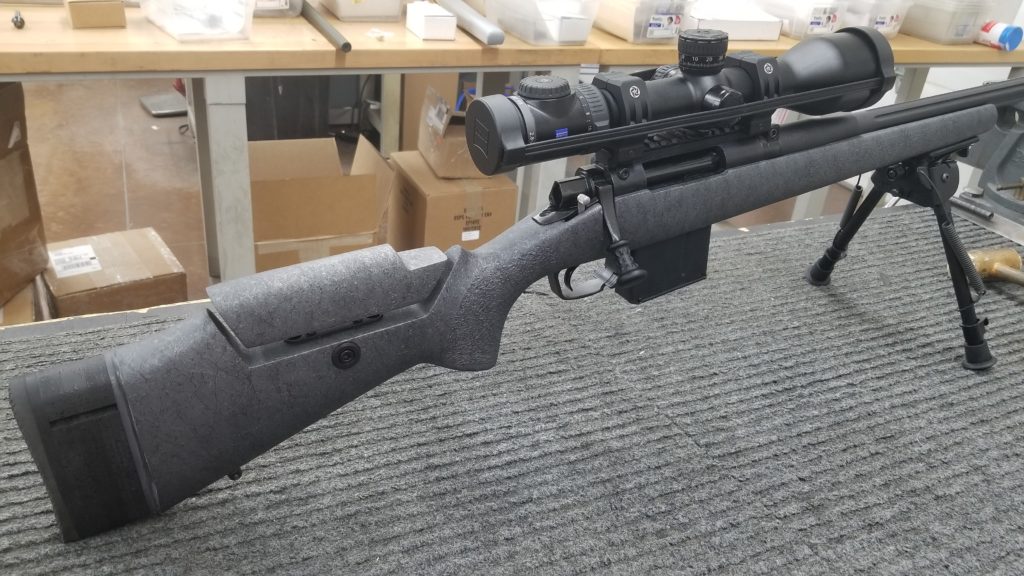
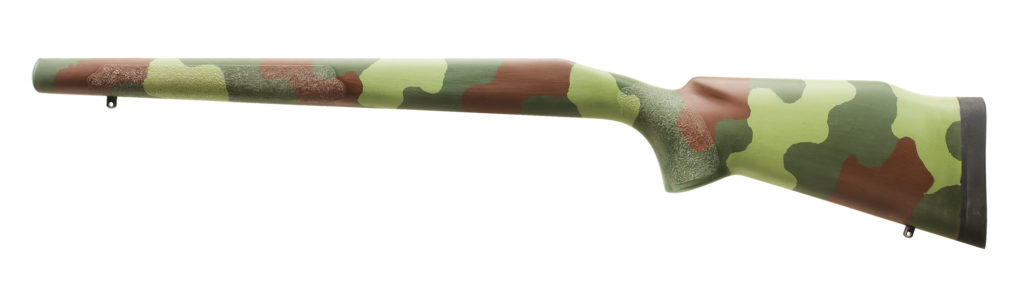
One of the next major decisions was the stock. Dad and I are both big fans of wood, but in terms of practicality, there really is no beating fiberglass. After considering all the options, I decided it had to be a McMillan for a number of reasons. One reason was lead- time, McMillan was able to supply an unfinished/blank stock within a reasonable timeframe. The second reason was quality, the McMillans I have seen on average seem to have a better fit and finish out of the mold than some competitors. Lastly, I wanted a stock with fill only, that wasn’t built around a bedding block. This is so it could be pillar bedded using my choice of pillars. After debating which of several stocks in the McMillan line would be best for several weeks, I finally ran out of time and pulled the trigger on an M40A1 HTG. This stock has a fairly traditional look and handles like a fairly traditional stock as well. It doesn’t feel or look out of place in a hunting or field application. It balances those traditional attributes with a bit of tactical thrown in, it has a larger forend, good for larger barrels as well as larger hands and can be had with an adjustable cheekpiece and spacer system to adjust the length of pull. I ordered the stock with both of these options, but without any adjustable cheek hardware. Staying on the classic side of the fence, the stock would be configured with 3 sling studs in lieu of tactical rails or flush cups. The stock was ordered with a glass shell and standard fill, not the lightest but durable, cost-effective, and practical.
McMillan M40 HTG
Enough decisions had been made that I could hardly move further forward without deciding what the barrels would be chambered in. The Nucleus, with its removable bolt face, would have allowed for nearly any option. Initially, I was leaning towards a 6.5mm or 6mm Creedmoor for one barrel and a 300 WSM for the other barrel. I wanted a good amount of capability delta between the two, with the smaller optimized for game up to and including deer, and the larger being more appropriate for elk and other large North American game. In the end, I opted for a 6mm cartridge and a 7mm cartridge, the venerable .243 Winchester paired with the venerable .284 Winchester. The advantage of pairing the 284 as the large cartridge lies in the rebated rim of the 284. It will run with the same bolt face size as any cartridge in the 308 family, including the Creedmoor’s or the 243. This meant there would be fewer steps and less complication when switching from one barrel to the other. Somehow it seemed natural to lean on these longstanding cartridges for this build.
Problems solved, dominos falling, but oh-so-many decisions to go. Barrels and barrel contour. Bottom metal. Magazines. Rings. Optic. Trigger. Bipod. Sling. Ammo… Oh yes, what about the ammo? I was originally wanting both cartridges to dope out very much the same, at least out to 400 yards. In theory, one should be able to switch barrels, re-zero, and go shoot. Whatever mechanism one was used to for range and wind drift compensation could, would, should apply to both cartridges. Some research suggested this was feasible with load development. Middle-weight bullets in 6mm and 7mm have comparable ballistic coefficients. If the 284 were loaded hot and the 243 were a bit on the mild side… you could match the ballistic trajectories under an inch from 0 out to 400 or more. Perfect. This would take some work on the load development side but should be do-able. Onto the next decision…
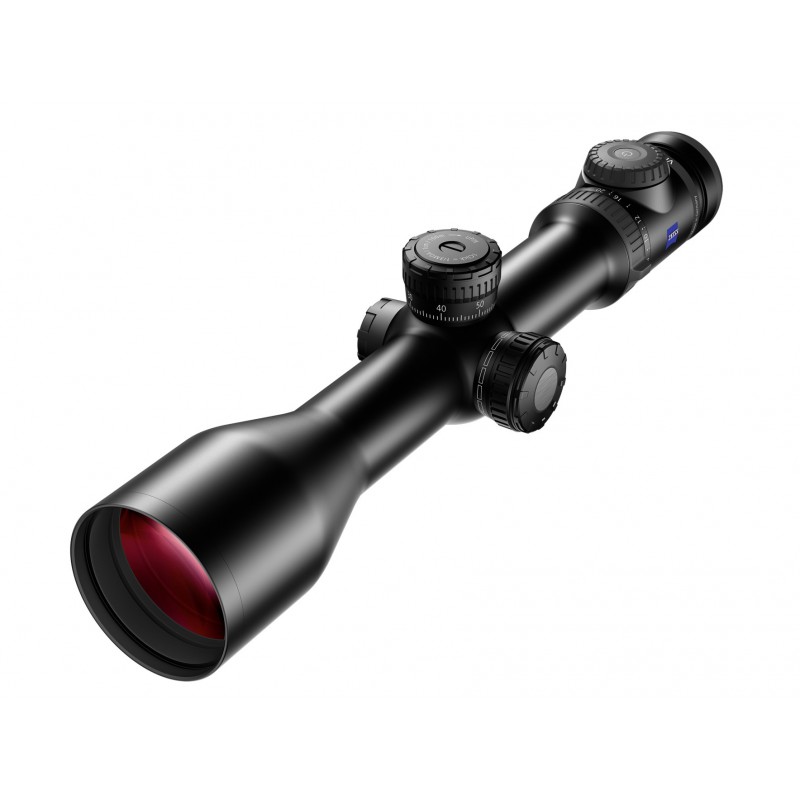
Optics. Let’s see… Most of my father’s hunting experience has been with sub-10x scopes. 2-7x, 2-8x, 3-9x. Tiny objectives. I initially thought perhaps I should get him something in this ballpark, maybe with a modern reticle and turrets, and/or with a bit more zoom range. There were some good options for hunting optics in the 3-12x ballpark, with 40mm or larger objectives. Then I remembered, the one rifle he has been spending some time shooting is my .17 rimfire with a cheap 4-16 on top and a big objective. It doesn’t have great glass, but he likes having that range, likes being able to zoom way in and see some detail even if he zooms back out to take the shot. That settled it. It should be a scope with a big zoom range, and a big objective. Given that, it still needed to be a hunting scope. So big zoom range and objective, without also being crazy heavy or having too little (or big?) minimum zoom. I decided the Zeiss Victory V8 2.8-20×56 was the best option meeting those requirements and restrictions. Huge objective and zoom range, very useful zoom range for hunting, without weighing an absolute ton. At 29oz this scope is not a lightweight by any means but is more than a pounds lighter than some tactical scopes with a similar zoom range and objective while being only slightly heavier than other much less capable hunting optics.
Zeiss Victory V8. That’s some pretty amazing glass.
After ordering the Zeiss scope it shipped and showed up very promptly. Upon inspection of the optic, accessories, and manual I realized it changed my assumed ammunition plan for this rifle. The Zeiss Victory V8 comes with an MOA-based turret for elevation adjustment pre-installed. It also comes with 9 different meters-based (Yes, meters…) turrets designed around common drop rates for ammunition. These alternative turret bands are easy to install in just a few seconds. I played with the calculator on the Zeiss website for some time with some of my proposed loads and found one of the bands was a very close match to each. After this, I realized dope wasn’t a problem. Figure out which band goes to the load for the 243 and the 284 and run without compromise. YES. Now we’re cooking with gas.
It’s all well and good to have a plan, but it was coming time to execute on it and that is a whole different animal. The receiver, stock, optic, and a wish list in hand… What next?
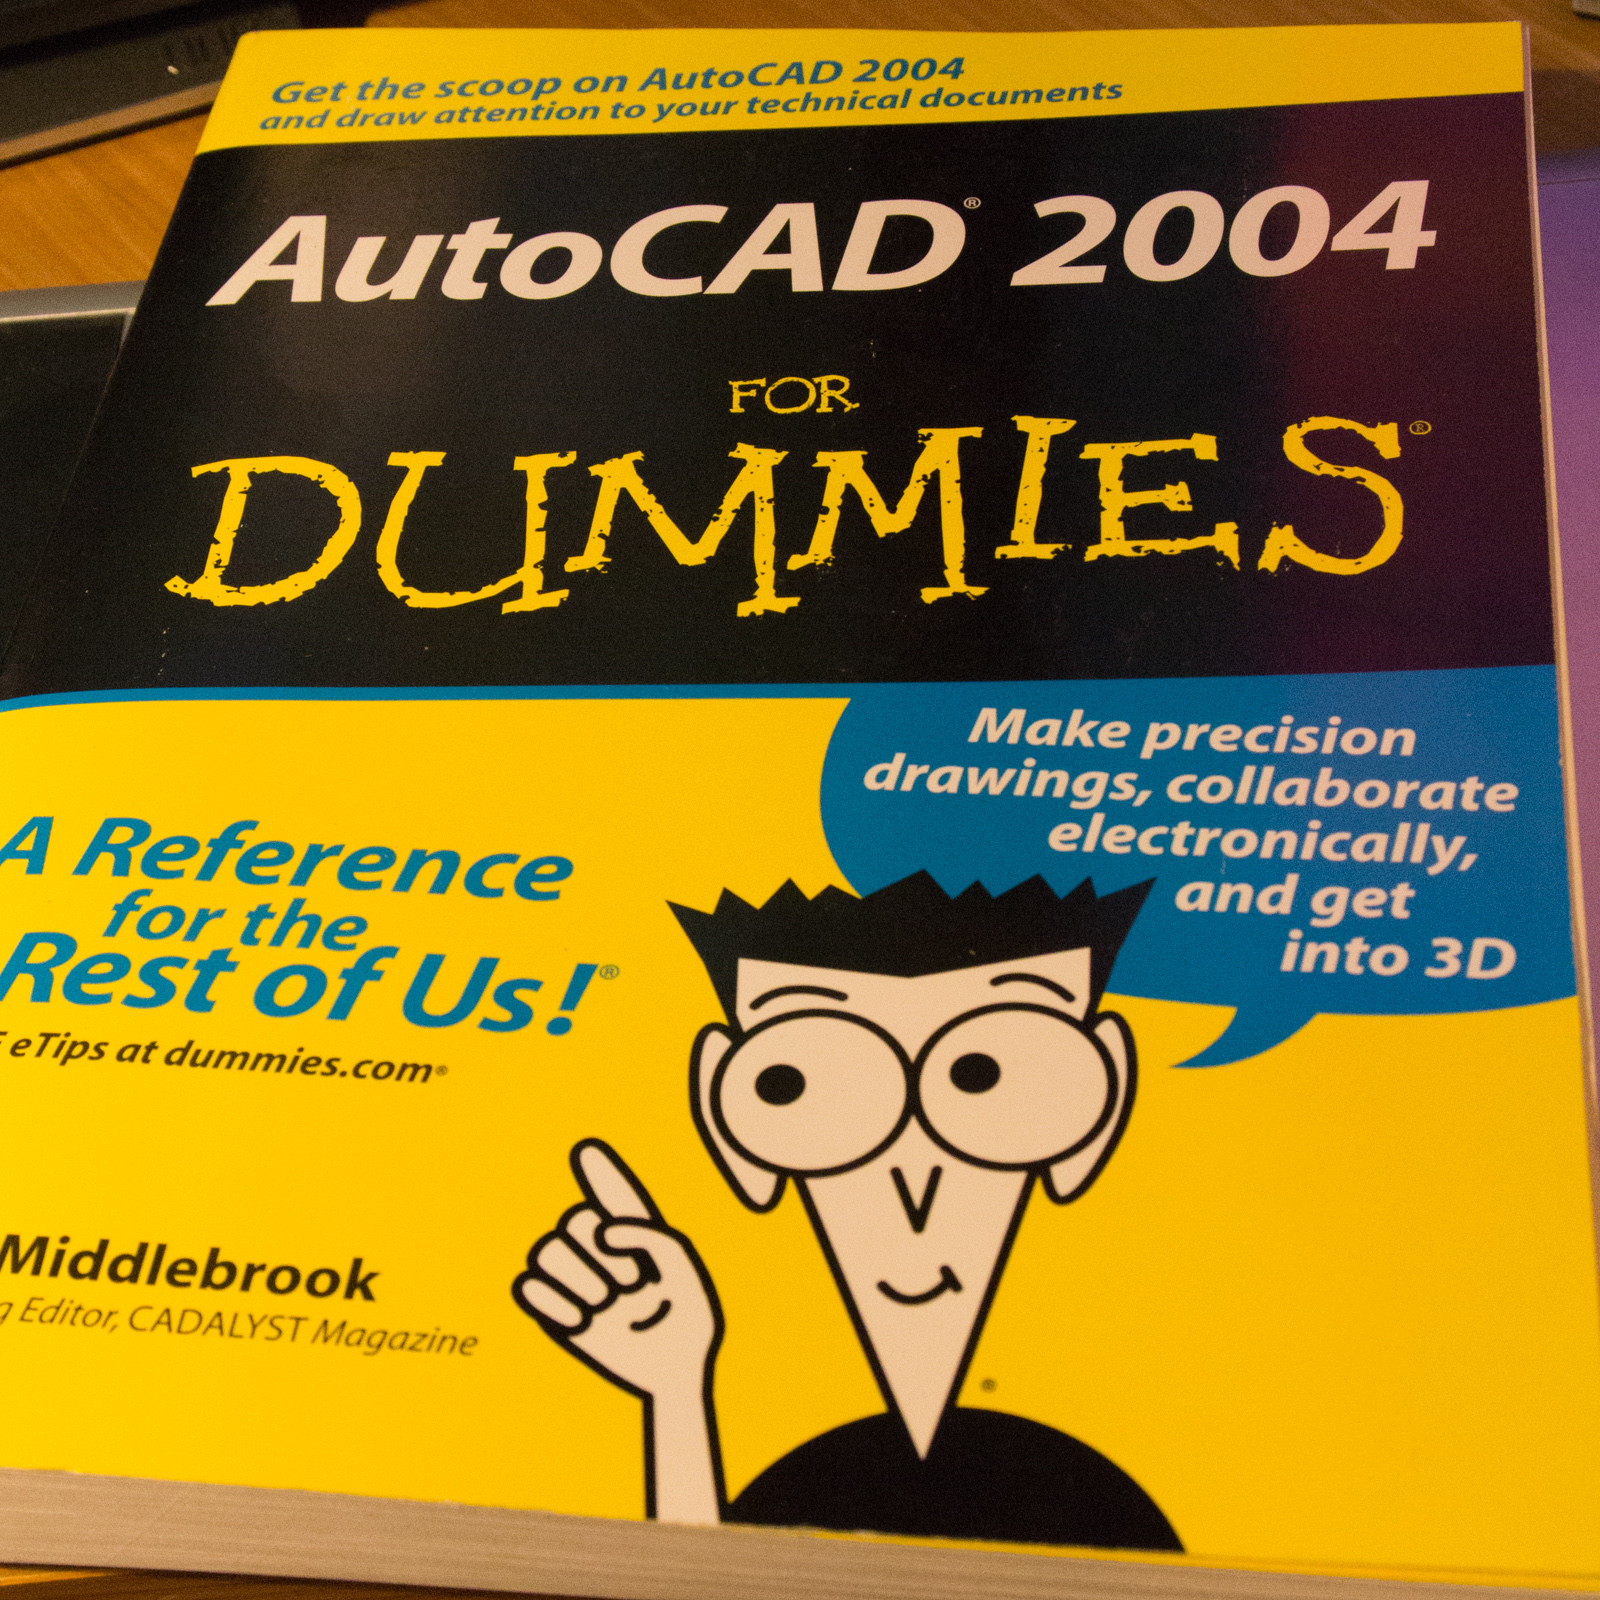
Over the past 20 years, I have on numerous occasions grabbed the latest demo copy (for some definition of “demo”) of AutoCAD or SolidWorks and sat down with it, determined to learn how to make things. For many years I have been aware of various CAM packages designed to help turn 3D models into tool paths for CNC machines, and more recently slicing software for turning 3D models into printable models. It seemed to me that a person could go out and buy a CNC mill or lathe and the requisite accessories, one could go buy CAM software, and then one could start making parts. Sure, you would probably send quite a bit of raw material and tooling to the recycler along the way in a teach-yourself-machining scenario, but you could start building stuff — especially simple things — almost immediately. Except… well, you needed a 3D model at the start of the whole process. The more you know the more you realize you don’t know. Obviously the “if I have a 3D model I can run!” concept is a gross oversimplification of every step, and disregards what one could spend an entire lifetime becoming really good at. When I first started thinking along these lines I was a teenager, optimistic and all-knowing.
AutoCAD 2004 For Dummies
At some point, this gem made it into my collection and has faithfully gathered dust next to a slew of programming reference manuals. The “For Dummies” book that I wasted $24.99 on at Borders in Rapid City, SD as a 21-year-old provided as evidence that when I say I have been wanting to CAD for 20 years — I’m not completely full of shit. Just mostly. There’s a point here: it DOES start with a model. You can prototype 1-off things by hand all day, but if you want the benefit of computer aided manufacture, whether you are adding material or subtracting it, you need to be able to model the resulting part. Your model may look a bit different based on the manufacturing method, but it sure as heck won’t look at all if you can’t build it. So this is the hard part, the mental gap, the crux.
It’s a whole new world now. When I buy reference manuals I find I don’t actually have time to read them cover to cover and absorb the knowledge, just use them for reference. I’m busy doing stuff, paying bills, being an adult. When did that happen? So I know myself well enough to know that if I want to learn something new, and fit it in, buying a book doesn’t cut it, I need a practical project to apply it to.
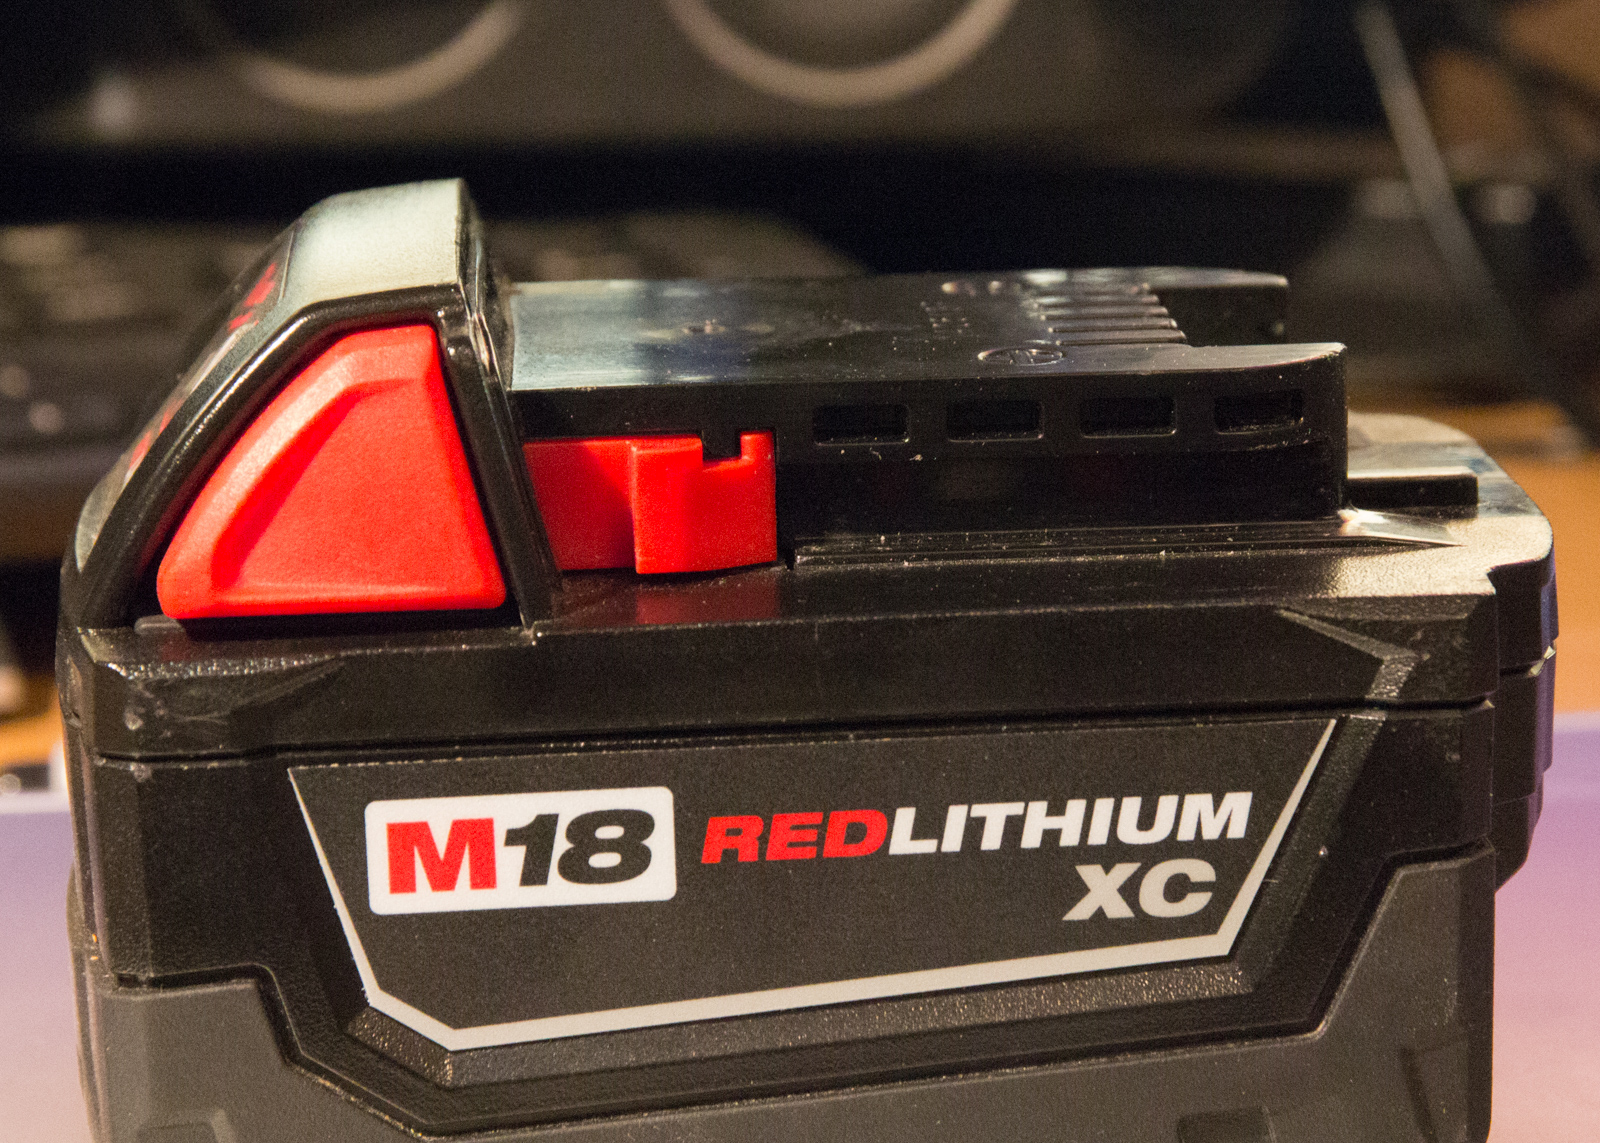
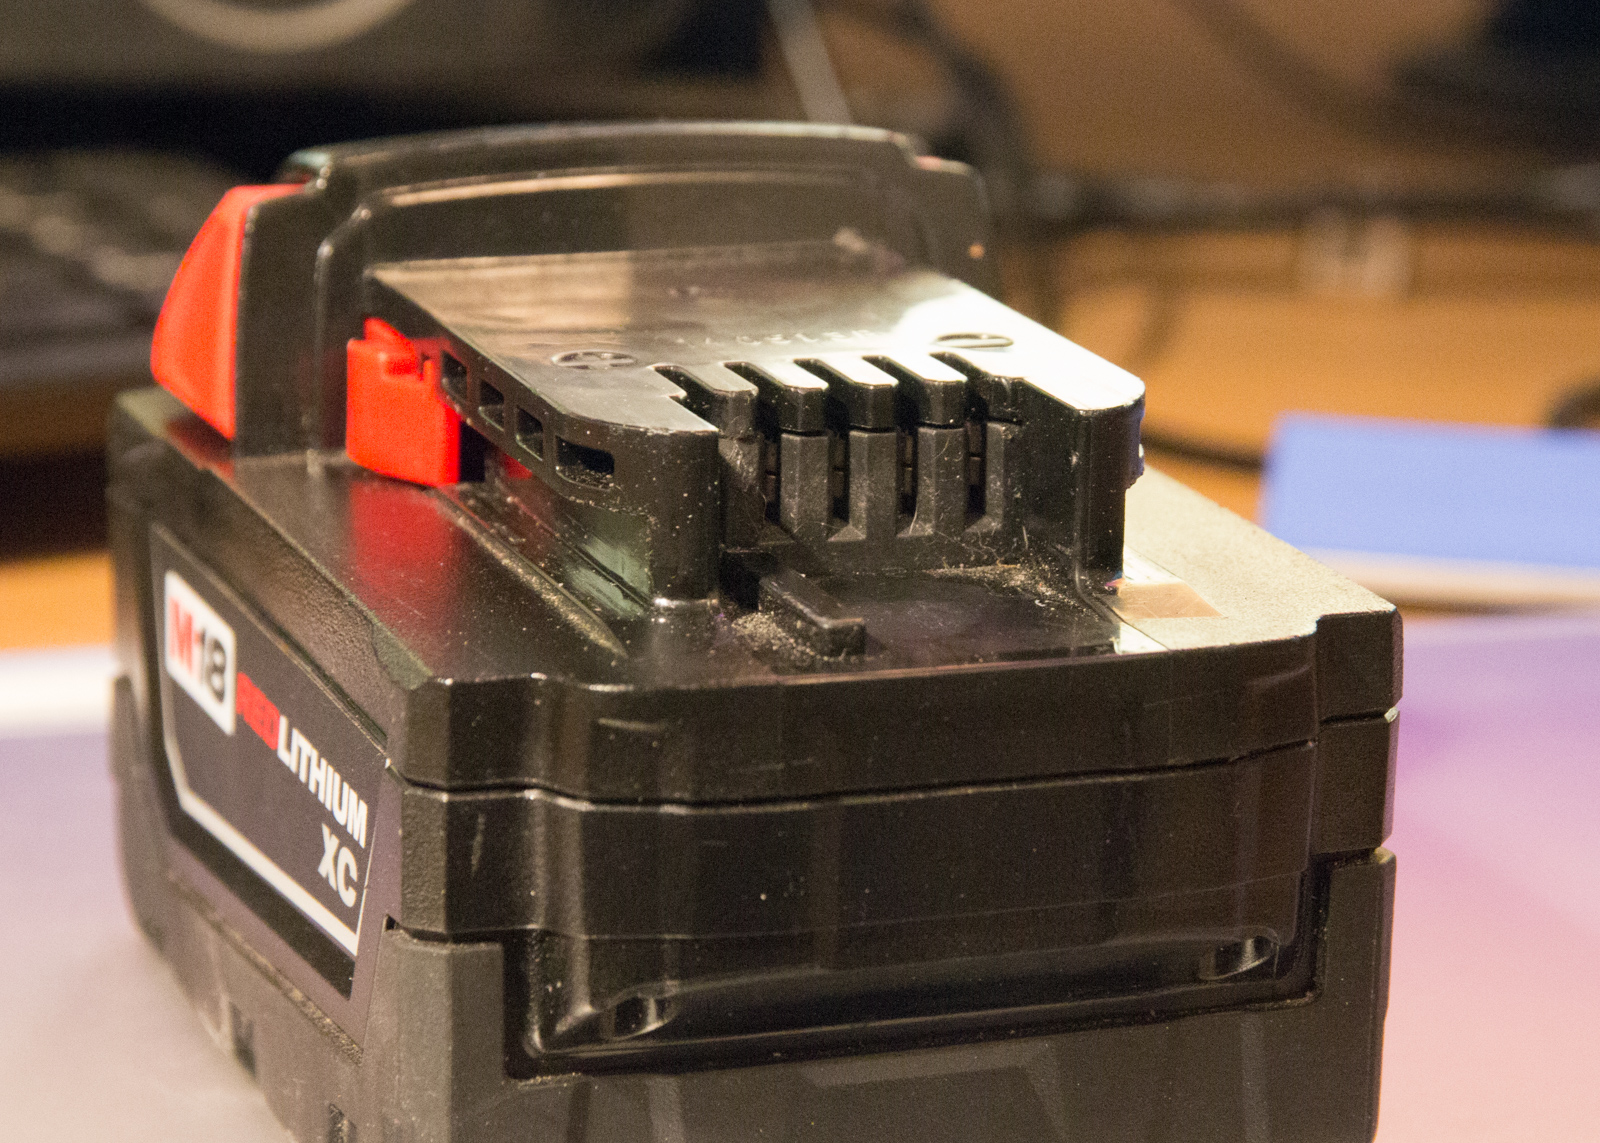
Milwaukee Red Lithium Battery Side View
Milwaukee Red Lithium Battery Connector View
I have a few of these Milwaukee batteries around, and they are pretty good stuff. 54 Watt-hours in this specimen, 72 Watt-hours in another, that’s enough lithium stored ion fairy magic to do something serious. By comparison, my previous generation DeWalt power tool batteries were only in the 20-30 Watt-hour (Wh) ballpark.
There are lots of applications where I could use a good battery, bike lights, powering small electric DC motors, recharging my cell phone after too many hours watching YouTube videos, jump starting my motorcycle(s) every spring because I forgot to plug them into the battery maintainers… Lots! Milwaukee is obviously hip to this concept, as they sell a “Power Port” with a built-in inverter that snaps onto one of these M18 batteries and supplies a 5V USB port. There are a damn lot of cell phone charges in a 72Wh battery. Typical high capacity smartphone batteries are in the 10Wh ballpark. See also: Why Watt-hours
A few years ago I did a fair bit of work for a Rapid City company named B9Creations. They sell a 3D printer very popular among jewelers. As a result of that work, I learned enough about the competing 3D printing technologies to make what I felt would be an informed purchase decision, the ability to realistically weigh initial purchase price, consumable price, time spent on maintenance and configuration, print speed, build volume, etc. B9 sells a great product and if you can reasonably incorporate 3D printing into your job then you should probably consider buying one. SLA is rad. In my case, any 3D printer is going to sit next to my $49 InkJet (Ok, ok, $299 LaserJet) and very likely not get used at all once the novelty wears off. How much is the novelty worth? Not. Very. Much. That LaserJet is a bit of a novelty, the $49 InkJet would have been OK — so I guess if we do the math, the novelty is worth less than $300. My standards weren’t exactly that low, though, 100 micron build resolution? Yeah, that seems like a MINIMUM standard. 100mm/sec build speed? Again, minimal. The idea of it taking a full 24+ hours to build large/complex parts makes me roll my eyes and lose interest in a hurry.
Six months ago or so I stumbled across the Monoprice line of 3D printers. If you are unfamiliar with Monoprice, their business model is interesting and seems to fill a niche. They buy a bunch of something in a common specification, sell it at a very good price, and provide a reasonable level of service/support. So 1 option, not 37. No fancy packaging. Not straight from overseas so I can easily return it if I need to. This works for me and is a niche Amazon is also seeking to fill with products branded Amazon Basics.
For the last six months or so, I have had my eye on their V2 Mini printer, which comes in around the $200 mark, and has favorable reviews. My biggest concern was with the build volume, it’s also pretty slow. But, but.. $200! Fast forward six months, I noticed the “Maker Select Plus” model, which retails for $399 was available as a refurbished unit for a reasonable ($50) discount. I have always had good luck with refurbished equipment and am not afraid to give it a go so long as there is a reasonable length of time where I am able to return it. After deciding I could probably, maybe, possibly… justify this .. I noticed they had an “open box” version of the same model, which ostensibly is a unit that had been returned but had not gone through the refurbishment process, for $299. This printer and many other popular low-cost printers are based on an open source design. All of the parts are exposed, replacement parts are easy to source, and any problems shouldn’t be rocket science to diagnose. Bottom line: I can fix it or return it if it comes out of the box broken. Ok — fine. Printer ordered for $299.99, $0.01 below my novelty purchase threshold.
There is not TOO much to say about the unboxing and assembly, you can find that review somewhere else I am sure, but I will detail what was notable. The printer I received had obviously run some material through the nozzle but the build platform did not look used. Overall it was well packaged and was easily assembled. My problems began almost immediately after assembly, though. In total, I ended up with several hours into debugging, which is no big deal and I am still happy with my purchase. It’s hard to put the issues I ran into in context, to a person familiar with 3D printers or other multi-axis CNC equipment they may have diagnosed and fixed similar issues in ten minutes. Most people probably would have returned the printer out of frustration. The printer auto-homes at startup to sort of figure out what’s what and where everything is. I thought nothing of this auto-homing procedure to start, as I assumed any limit values for the three axis’s, axes, plural axe, would be hard coded in firmware somewhere, or something. This was ostensibly confirmed as there was a setting for the start positions of x, y, and z accessible via the touch-screen menu. After startup, it was nearly impossible to calibrate the build platform to get it perfectly level. The machine was also slightly bent from the prior owner trying to get this calibration done — fortunately not bent in a way to compromises the machine in any way, just gives it character aesthetically. After dinking around for a couple of hours I got it mostly sorted out, or so I thought. Then I noticed the quality of the first few layers of my part seemed to vary if the machine had been turned off and back on in-between prints. The only difference that would make is if the auto-home process was affecting something. One thing I found weird about the machine from the start, was the auto-home for the Z axis would touch down at a spot off the build platform, it was touching down on the bolt head used to secure the heated platform down, not on the print surface. I did not know if this was right or wrong, it just seemed odd. As it turns out, it was wrong. Depending on where it touched down on this rounded bolt head, it would throw off the first layers, or not. Dead in the center of the bolt head and my adjustment held, just slightly off center and everything was a mess. It all suddenly made sense. The build platform was moving too far during the auto-home process, and the machine was setting up configuration values based on where it stopped in this process. I adjusted the Y axis limit switch so the build table would stop slightly further toward the front of the printer. This resulted in the extruder always touching down on the actual build surface during auto-home. Boom. Easy to calibrate. Calibration held every time. Off to the races. I haven’t verified this is how the printer actually works in reality, for what it’s worth, I’m mostly just pulling all of this out of my rear. Tell me I’m full of it, I’ll probably believe you.
So I’m printing test prints downloaded from the internet. That’s cool, except there are a few million models I can download from all manner of different websites and they are all utter rubbish. Toys, novelties, trinkets. Mostly just trash though, really. The only ready-to-print models I have found so far that I expect to be useful are replacement parts for the printer… (Yeah, OK, so there’s a Milwaukee battery mount model out there already, but that’s beside the point)
On to the project at hand! Using these Milwaukee batteries for stuff other than making power tools spin! Shit. I’m back to needing a 3D model.
I spent a few days playing with various pieces of software. Some free, some not. Fusion 360 seems pretty capable for the price. I can see why TinkerCAD is popular, it is in fact quite easy to pull off basic things. I watched a bunch of videos. Lots. So many videos. I tried quite a few different things. I started to get the hang of it. Started being the key word. I sort of started getting my brain wrapped around this concept that I could draw things, and then apply fixed constraints to different pieces to make my imprecise drawings precise. Still, it all felt quite imprecise and clumsy. At this point, I knew one of the primitive operations the CAD platforms are all capable of doing is “extruding” a 2D shape into a 3D object. I couldn’t help but think about how much easier it would be to programmatically generate a vector, then import it into the CAD package to extrude it into a 3D shape. After years of tackling problems with algorithms, it was more natural to think about solving things this way. In programming we are often conceptually thinking about three dimensions, often times multiple three-dimensional data structures in addition to how the data structures interact with one another. Conceptually, this 3D modeling thing was easy. There I sat, though, in a GUI-driven CAD package able to model in my mind exactly what I wanted to do and how I should be able to go about it and unable to express that through the GUI. Frustrated. Tired. The novelty was wearing off quickly.
I didn’t want to give up, not this time, so I started looking at how I could script CAD tools to do some of what I wanted, programmatically, while I continued to learn the interface. Yep, in retrospect I was basically a rat in the bottom of a flushing toilet gasping for air, I had a lawn to mow and a room to paint and laundry to do and bills to pay, there was no time for this point-and-clickery.
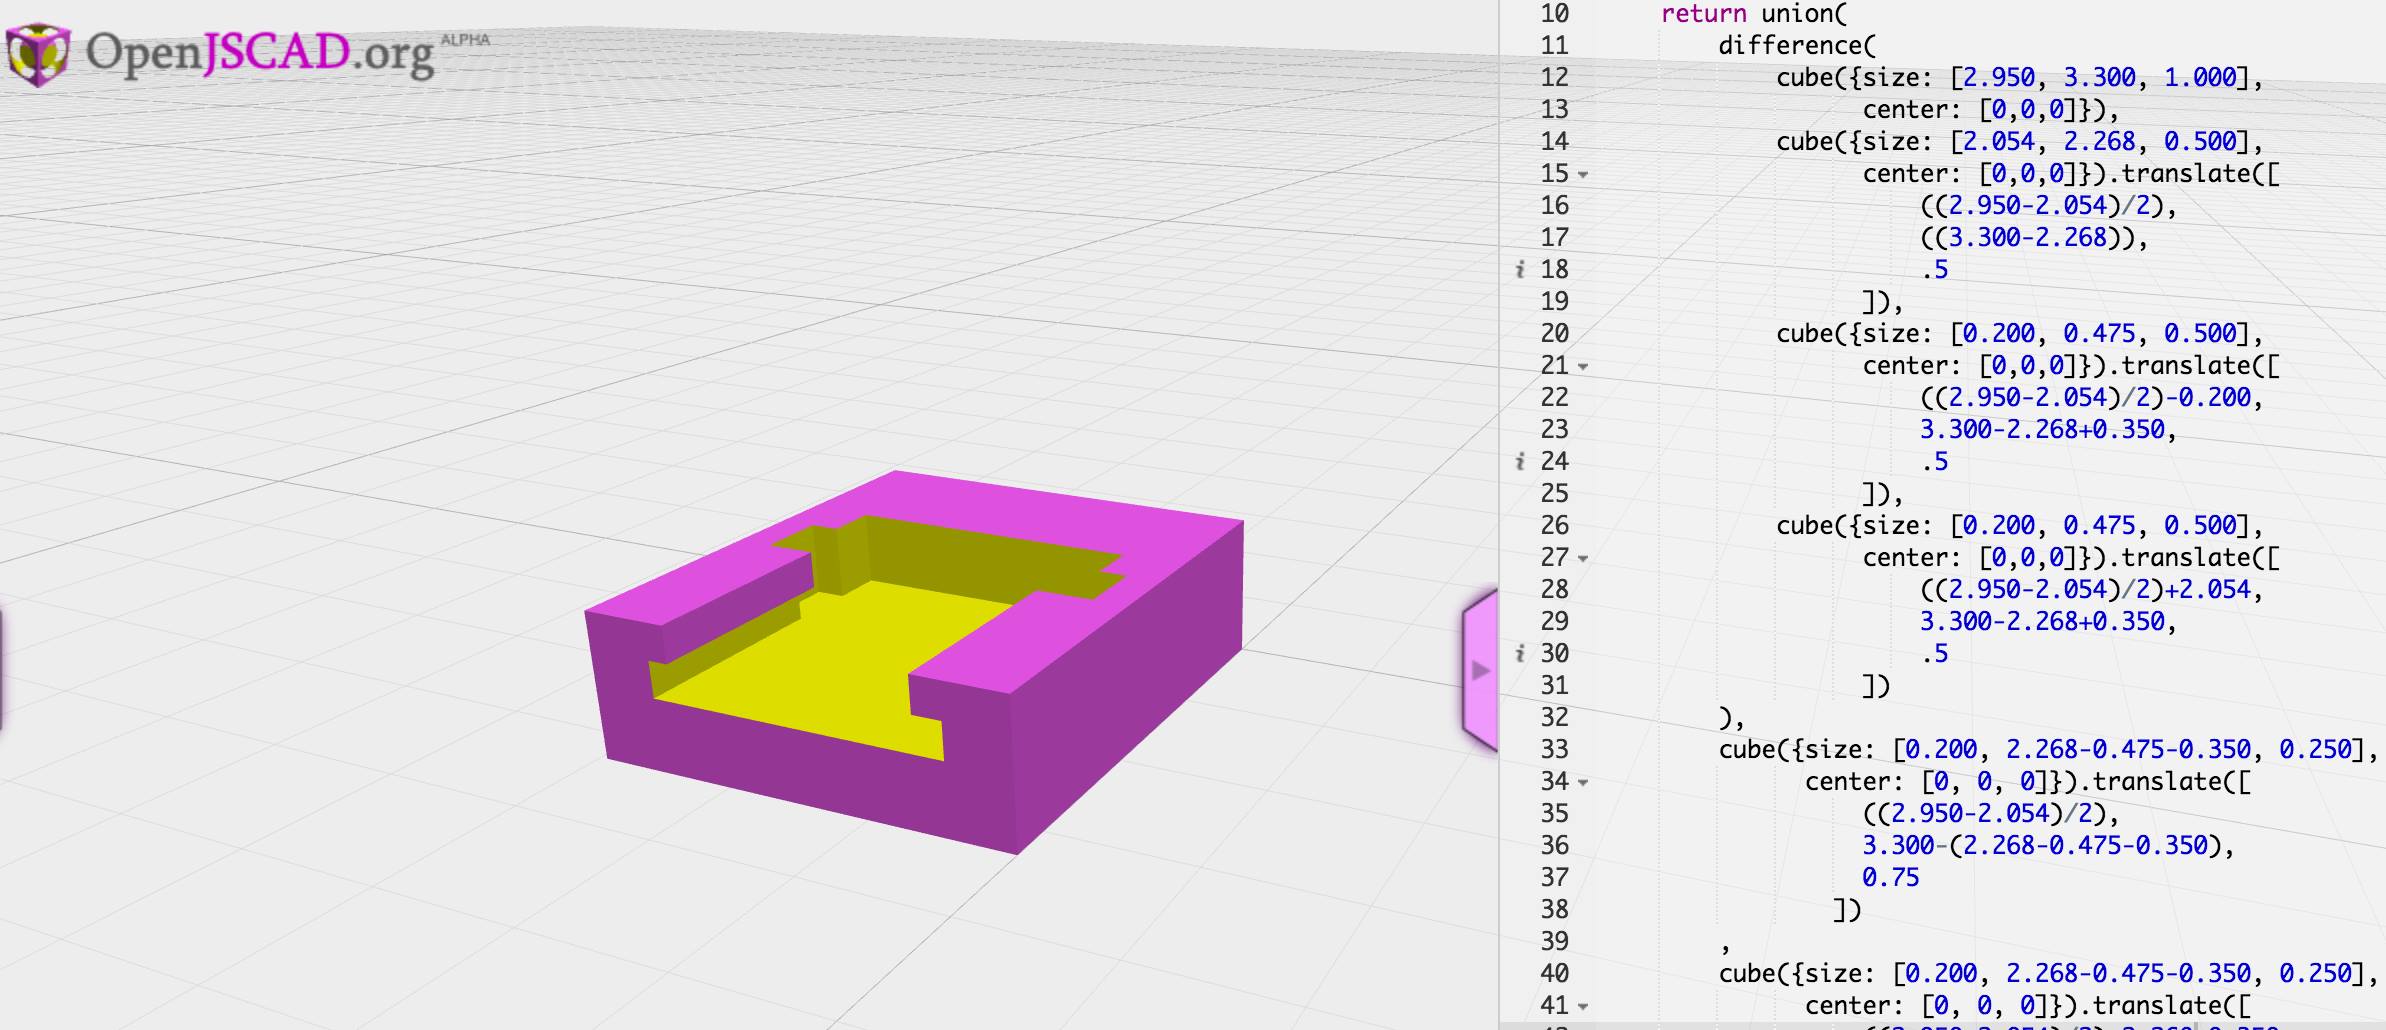
Then I stumbled on Blender and its ability to be scripted with Python, OpenSCAD, and most interesting to me, OpenJSCAD. I almost didn’t pursue learning any of these tools. It seemed like the GUI-based modeling software/method is what everyone used, and perhaps these tools were just fringe software stacks of questionable quality. I watched more videos, I spent more time pointing and clicking. It still wasn’t clicking, though. Not having printed anything of my own creation yet, I finally broke down and sat down with an OpenJSCAD instance in one tab, the documentation in another, and a Milwaukee battery and digital caliper in my lap. I started taking measurements, I started creating shapes. I started merging shapes and subtracting them from one another. I made a whole bunch of mistakes, the code was a mess, I put the battery clips in the wrong place, I used the wrong units. I had a model though.
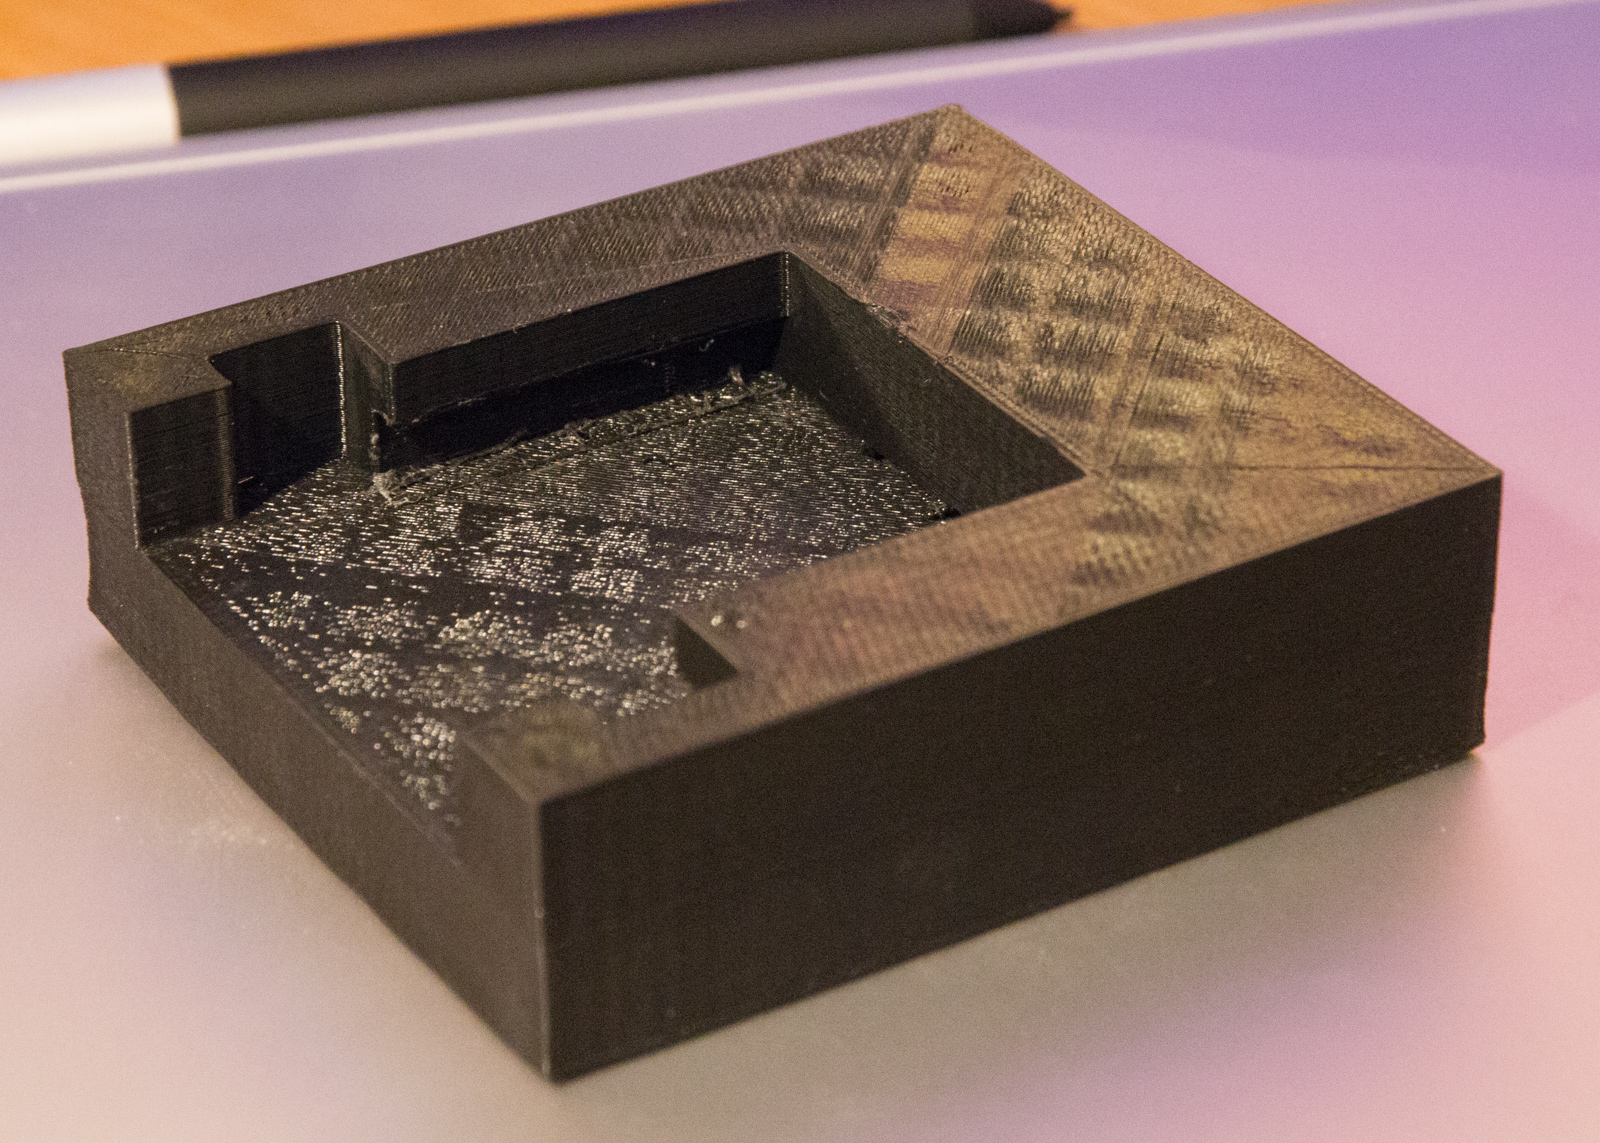
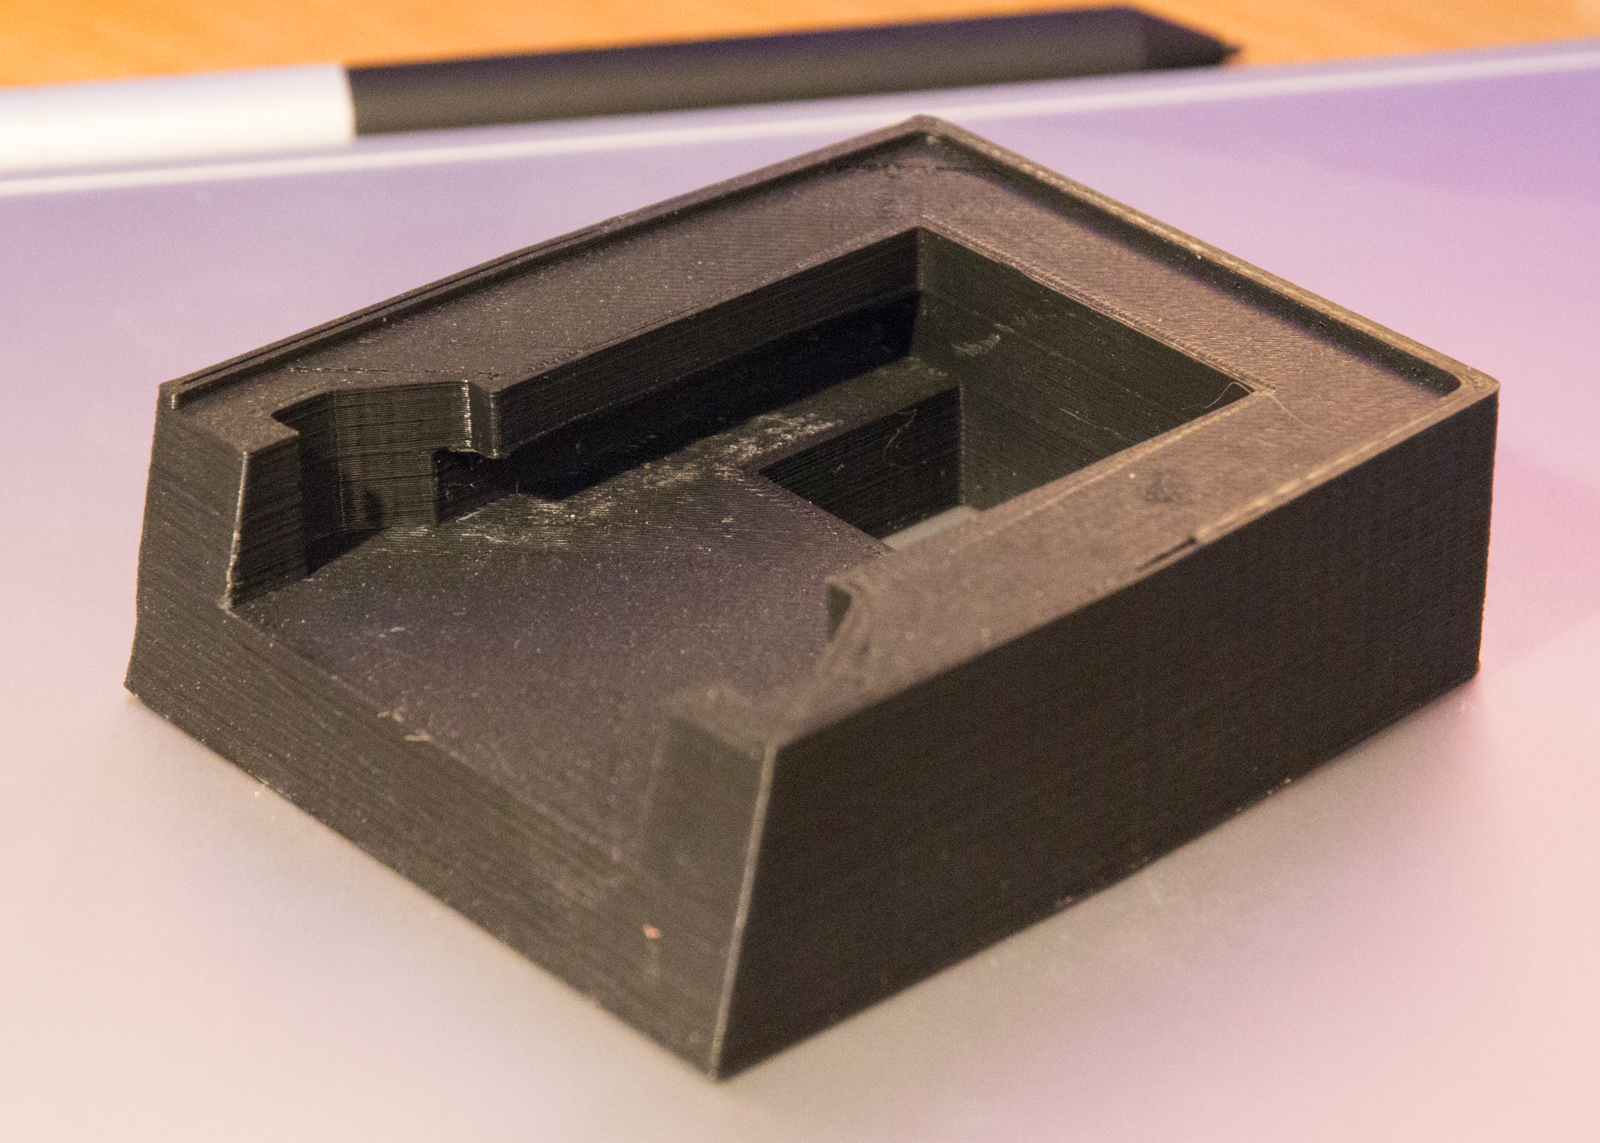
I slept on it, made some tweaks, and printed it to validate whether or not I could even slide a battery in and out. I was completely ignoring the electrical connections at this point. It printed, my battery didn’t fit. Easy to see why not though, I did another iteration. Printed, the battery still didn’t fit — but darn close! Iteration three, after learning about hull operations and how to radius things and… the model looks a lot better AND THE DAMN BATTERY FITS. I have printed 7 of these now, each with various tweaks that have been an improvement on the prior.
Milwakee Battery Holder – Print #1
Milwakee Battery Holder – Print #2
Milwakee Battery Holder – Print #3
Milwakee Battery Holder – Print #4
Milwakee Battery Holder – Prints #1-4
The most recent iteration (not shown) has electrical connectors and is fully functional. I have been quite impressed by the structural rigidity, strength, and light weight of the finished printed parts. You aren’t going to build passenger planes or rockets that can go to space with these parts, but for coming out of what is essentially a really precise hot glue gun they are amazing. Print #4 weighs 29 grams. It was printed with Monoprice PLA+ filament that was $19.99 for a 1kg spool. Material cost for this print? $0.58. Print time? About two hours. Would I trust it to hold onto my 1.5lb battery while it was repeatedly subjected to 3-4g’s? Yeah. Probably. It’s a functional part.
It has now been 1 month since I ordered the printer. OpenSCAD and OpenJSCAD have proven to be very rich environments for creating models. I find I am only limited by my ability to adequately express myself in code. This is the same limiting factor (mental leap) I found in GUI-based tools as well, but with the programmatic interface, I am able to bring my experience to bear on the problem. Sometimes my solutions lack elegance, but I can make it do what I want!
Developer? Want to model parts in 3D? Don’t do the clicky. Do what you do.
MachForm (self hosted) is a great tool for managing many different types of user submissions from visitors to your website. While WordPress has a great form option in Gravity Forms, MachForm is platform agnostic and has a number of integration options allowing it to coexist fairly well with almost any LAMP-based web deployment.
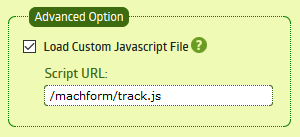
Since version 4 MachForm has allowed for loading of a Custom Javascript File, configurable on a per-form basis. This provides an excellent facility to track form submissions in Google Analytics. These events can then be used to create goals, etc.
This is actually perhaps easier than it sounds, the first step is adding the Google Analytics embed code for the website to a file (assuming you are using the default iframe embed mode of MachForm), without the line for tracking a pageview. Since MachForm uses jQuery internally, we can use jQuery here to attach events to the form that will submit our Google Analytics event when the form is submitted. The portion of the code that extracts the title of the form may be different depending on the MachForm version, MachForm theme chose, or etc.
(function(i,s,o,g,r,a,m){i['GoogleAnalyticsObject']=r;i[r]=i[r]||function(){
        (i[r].q=i[r].q||[]).push(arguments)},i[r].l=1*new Date();a=s.createElement(o),
    m=s.getElementsByTagName(o)[0];a.async=1;a.src=g;m.parentNode.insertBefore(a,m)
})(window,document,'script','//www.google-analytics.com/analytics.js','ga');

ga('create', 'UA-XXXXXXXXX-1', 'auto');

$(document).ready(function(){
    $('#submit_form').click(function(e){
        var title = $('#form_container > h1 > a').html();
        ga('send', 'event', 'form', 'submit', title);

        var form = this.closest('form');
        e.preventDefault();
        setTimeout(function(){
            form.submit();
        }, 500);
    });
});
Once this JavaScript is saved to a file and uploaded to your server, add the path to under Advanced Options for all the forms you wish to track and you are off to the races.
Recently I was asked to look into a potential PCI compliance issue in Magento 1.7/1.8/1.9. The potential issue was uncovered by ControlScan. The summary was as follows:
Integer based SQL injection vulnerability in product parameter to /checkout/cart/add/uenc/<snip>,/product/<id>/

Risk: High (3)
Port: 80/tcp
Protocol: tcp
Threat ID: web_prog_sql_integer
Upon diving into the additional supplied information, it was almost immediately clear what the test was doing. It was performing a POST request against the URL: /checkout/cart/add/uenc/<snip>,/product/XYZ/
XYZ translates to a valid Magento product id. In the payload (POST’d multipart/form-data) that would get parsed into the PHP $_POST superglobal, an initial request passed product=XYZ, and a subsequent request passed product=XYZ-2.
The scan saw the same output returned for each request, and thus assumed the cart might be getting “duped” by the invalid XYZ-2.
Let’s take a look at the code which handles this submission (which is an AJAX style action that adds a product to the cart). It is located in app/code/core/Mage/Checkout/controllers/CartController.php, starting around line 170, in the addAction public method. The take-away here is the $params variable setup in addAction, as well as the product id discovery in _initProduct both retrieve their data by calling $this->getRequest()->getParams(); — this parameter data comes from any number of places, including the URL, GET, or POST. In this instance, the product variable is being parsed out of the URL, and the product supplied via POST is never referenced. No wonder the output was the same, the URL was the same in both cases, the modified POST data was never a factor.
If you simply want to tighten up your cart to get it to pass your PCI compliance scan, the following code will do that for you, just replace the top part of addAction with the following, and be prepared for an eventual upgrade to undo this patch.
public function addAction()
{
    $cart   = $this->_getCart();
    $params = $this->getRequest()->getParams();

    $postInput = file_get_contents("php://input");
    $postStrDataArr = explode("\n", $postInput);
    $postStrData = array_pop($postStrDataArr);
    parse_str($postStrData, $postData);

        if ((isset($postData['product']) && $postData['product'] != $params['product']) || !is_numeric($params['product']))
        throw new Exception('Invalid Product ID');

    try {
This modification compares the parameter parsed via the URL with the parameter passed via POST and throws an Exception if the two do not match.
No doubt there is a better and more Magento-esque way to remedy this issue, but the above will work in a pinch.
In 2009, Google introduced a method website owners could use to disambiguate duplicate content. By specifying a rel=canonical link element in the header of the page you give the search engine a hint as to the URL which should be authoritative for the given content. It should be noted Google has indicated they consider this method a hint, and not a directive. The conditions under which the hint will be ignored are not known, but such conditions are presumed to exist.
Imagine a simple example, anyone who has purchased a home or property in the US is reasonably familiar with the Multiple Listing System (MLS). Real estate agents add properties to the MLS and the exact same information shows up on the website of every agent and agency. How does Google know which website(s) are authoritative for this information if it is the same on potentially thousands of websites? This is a contrived example of a real-world problem, and implementing a strategy around canonical link elements can help to ensure people end up where you want them to be. One strategy might be to get visitors to the website of the agency, rather than the individual agents.
That information is all well and good, in theory, but how does it actually work in practice?
A tale of two websites…
Recently there was a case where a series of several dozen guest blogs on an established website needed to be moved, removed, or somehow re-incorporated into the overall strategy. The established site and its mission had grown and changed, meanwhile, the blog series in question had grown less relevant to the overall goals of the site. But it was still good content that many people accessed and used as a reference!
It was decided the content wasn’t “hurting” anything, and could remain, but would be inaccessible via primary navigation routes and should over the long term be given a new home. The original author of the blogs was willing to give the content a new, permanent, home on his own personal site. The authors site did not yet exist, had no existing inbound links, and zero authority with search engines — a blank slate!
Each blog post in question was re-posted on this new website, several dozen posts in total, a handful of which receive a reasonable amount of search engine traffic. The canonical links for the articles on the established site were then changed to reference these new pages on the formerly empty domain.
Google quickly adapted to the new “home address” of these pages, and within a matter of days, the new domain was seeing all the search engine impressions for these articles. After this quick adjustment over a period of a few days, the pattern held over the following month.
In the following graphic, a screenshot from the Google Search Console, you can clearly see the number of search engine impressions served by Google quickly ramped from 0 to in the neighborhood of 50 impressions per day.
Here you can see the same data, over a slightly longer period, from the established site. The “new” site neatly stripped away around 10% of the organic search engine traffic from the established site.
Most scenarios involving duplicate content management with the rel=canonical link element aren’t going to exactly match this one, so please take these results with a grain of salt. That said, it does clearly show the cause, effect, and timing surrounding changing the canonical links for established pages. It also clearly shows that Google pays attention to these canonical elements and can take fairly swift action on them.
A new resource for visitors visiting the Sturgis area recently launched, it is a website called Visit Sturgis. The Visit Sturgis website contains a wealth of information visitors would have a hard time uncovering in a short trip without a local guide. Not only will the new website be useful as a planning tool for those who will be visiting Sturgis as a pre-planned destination, but also for ad-hoc visits. Sturgis sits directly in the heavily trafficked Interstate 90 corridor and as a result sees many thousands of visitors every year who are simply passing through.
The resources and information on the Visit Sturgis website will cover the usual suspects, such as information about lodging, restaurants, and local businesses of interest. The website will also contain a great diversity of information about local events, and little known avenues for recreation.
There are also many miles of non-motorized single track trails accessible directly from town that cater to mountain bikers, hikers, trail runners, dog walkers, and horseback riders. See the recreation information on the Visit Sturgis website for more information about accessing these trails.
While this website may have been recently launched, it already contains valuable information that can not be found elsewhere. Expect it to continue to grow into and every more informative resource as time progresses.


 Based on the decision to run a 9″ suppressor the rest of the rifle needed to be short to be able to pack the whole package around, in and out of vehicles, or through the woods. I decided it needed to be based on a short action, and that there were plenty of big game capable short action cartridges available to make the package work. I was originally planning to build the rifle around an American Rifle Company Mausingfield action. Having seen these actions in person alongside numerous other tuned up and custom actions, there really just wasn’t anything else that could hold a candle to it. The Mausingfield is really just as good as it gets and the only negative thing anyone can say about it is that, well… it’s expensive. About the time I was ready to order the action, in early 2018 the American Rifle Company Nucleus was announced. The Nucleus retained many of the amazing combinations of features making the Mausingfield top-tier while adding some great additional features and reducing the price. Around the time the Nucleus was announced American Rifle Company also announced what they call the Barloc. This device makes it possible to quickly and fairly easily change barrels. It removes the need for a barrel vice, action wrench or any other special wrench such as for a Savage-style barrel nut. It even eliminated the need for a headspace gauge. If the barrel is re-installed to the same position, or with the same amount of torque, prior to tightening the Barloc, the headspace will be consistent every time the barrel is removed and put back on. Perfect. The Nucleus with a Barloc it is, and they were available at a discounted price at the time.
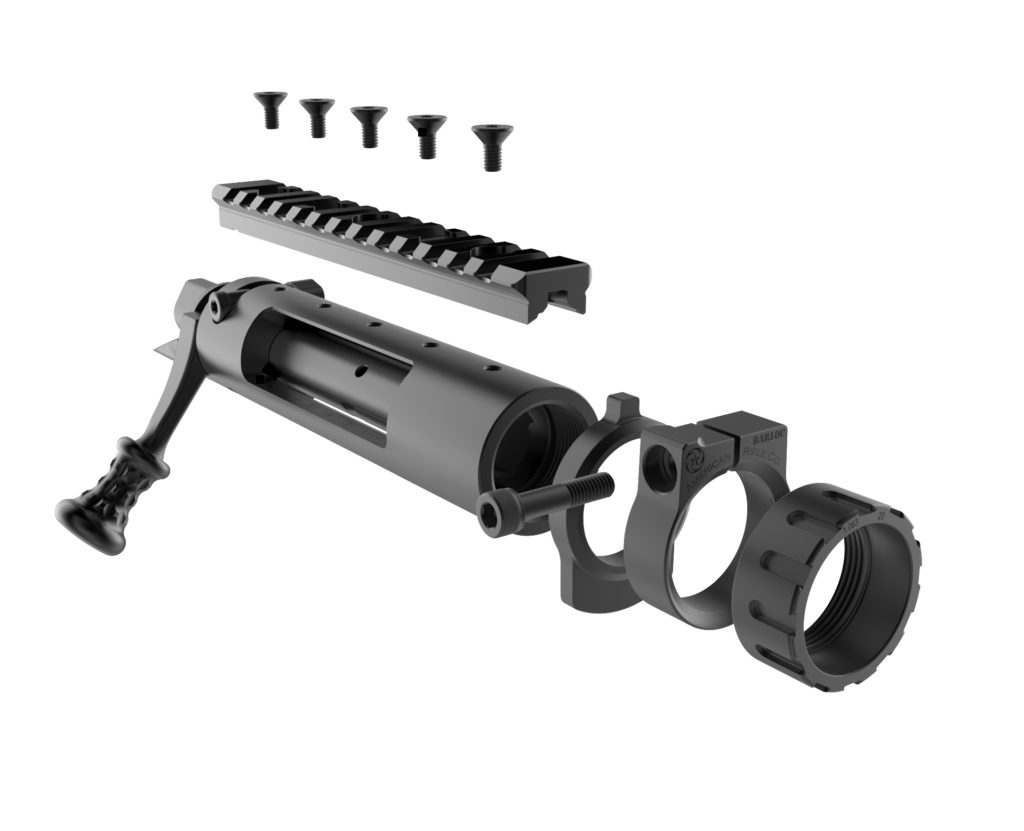

 MachForm (self hosted) is a great tool for managing many different types of user submissions from visitors to your website. While WordPress has a great form option in Gravity Forms, MachForm is platform agnostic and has a number of integration options allowing it to coexist fairly well with almost any LAMP-based web deployment.