New website

The new Black Hills Trails site is now live, although a bit sparse at the moment. Significant changes and additions are expecting in the coming weeks and months.

The maps and mapping functionality of PahaSapaTrails.com has been given to the Black Hills Trails organization and incorporated into this new site. As the maps and mapping functionality are extended and enhanced the PahaSapaTrails.com website will eventually be phased out altogether.

Generating aerial tiles from NAIP imagery

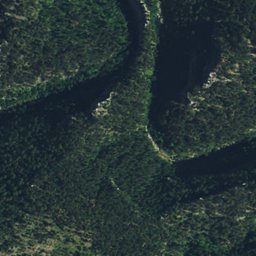
PahaSapaTrails.com is working on a mobile (iPhone/Android) trail mapping application for the Black Hills area and one of the chief considerations is making it work offline. As any local can tell you, cellular service can be spotty in the Hills, even in town in some cases! The plan is to let folks optionally download the map data/tiles directly to their device using the MBTiles format.

So you need to create your own aerial imagery tiles for a web slippy map project do you? Before you dive too far down this rabbit hole, take a look at the MapQuest Open Aerial tiles, they are available for use under very liberal terms and are good quality. I was only unable to use them for this project because not all tiles were available at all zoom levels that I needed for my area.

Getting and processing the data

Almost every year the NAIP (National Agriculture Imagery Program) captures imagery of most of the country during the growing season. This high quality aerial imagery of the United States (the same imagery used by Google and other web mapping providers) is available for free download from the USDA Geospatial Data Gateway. It may be available for order in other formats, but the only option available for download in my area is an ESRI Shapefile / MrSID format. The MrSID format is a typically lossy image format designed for very high resolution imagery. Unfortunately I have not found many good inexpensive tools for working with MrSID files, so the first step in this process is converting to a format that is easier to deal with in terms of software support, in this case GeoTIFF. The GeoExpress Command Line Utilities published by LizardTech, available for free download at the time of this writing, are able to do this extraction for us with the following command:

mrsidgeodecode -wf -i Crook_2012/ortho_1-1_1n_s_wy011_2012_1.sid -o Crook_2012.tiff

In this example I am using imagery for Crook County, Wyoming. The -wf (world format) option to mrsidgeodecode seems to be important, it tells it to create a geo-referenced tiff file.

Now that we have our imagery in the GeoTIFF format we can use the open source GDAL/OGR command-line utilities to slice and dice the data. The following commands used from here on out: nearblack, ogrinfo, gdalwarp and gdaladdo all ship with the GDAL/OGR libraries.

The next hurdle is that this raster imagery always has a border of not-quite-black pixels that need to be pared off somehow prior to being able to use multiple adjacent images (counties in my case). If your target tiles exist within one county (or one MrSID file as downloaded from the USDA gateway) then you probably do not need to worry about this.

nearblack -nb 5 -setalpha -of GTiff -o Crook_2012_NB.tiff Crook_2012.tiff

The -nb 5 option in effect tells nearblack how aggressive to be, this seemed to work for me but your mileage may vary.

After trimming the edges we need to warp the GeoTIFF to our target projection. Basically all web mapping uses the same projection, EPSG:3857. In my instance I am creating tiles with TileMill and their documentation specifies that GeoTIFF’s should be in this projection. The only trick here is that you must supply the source projection, the GeoTIFF contains coordinate information but it lost its projection along the way. Use the ogrinfo utility to first get a list of layers available in the shapefile you downloaded from the USDA.

ogrinfo Crook_2012/ortho_1-1_1n_s_wy011_2012_1.shp
INFO: Open of `Crook_2012/ortho_1-1_1n_s_wy011_2012_1.shp'
      using driver `ESRI Shapefile' successful.
1: ortho_1-1_1n_s_wy011_2012_1 (Polygon)

Then, you will need to get the information about that layer to find the original projection.

ogrinfo Crook_2012/ortho_1-1_1n_s_wy011_2012_1.shp ortho_1-1_1n_s_wy011_2012_1
INFO: Open of `Crook_2012/ortho_1-1_1n_s_wy011_2012_1.shp'
      using driver `ESRI Shapefile' successful.

Layer name: ortho_1-1_1n_s_wy011_2012_1
Geometry: Polygon
Feature Count: 12
Extent: (489299.300000, 4885056.470000) - (580705.680000, 4990601.000000)
Layer SRS WKT:
PROJCS["NAD_1983_UTM_Zone_13N",
    GEOGCS["GCS_North_American_1983",
        DATUM["North_American_Datum_1983",
...

In this case it is “NAD_1983_UTM_Zone_13N”, you may have to Google around to find the corresponding EPSG number, in this case it is EPSG:26913. After all that, we can warp the GeoTIFF. The –config and -wm options here speed up gdalwarp by letting it use more RAM, you may want to play with these a bit to figure out what is fastest for you.

gdalwarp --config GDAL_CACHEMAX 300 -wm 300 -s_srs EPSG:26913 -t_srs EPSG:3857 -r bilinear -of GTiff -co TILED=yes Crook_2012_NB.tiff Crook_2012_NB_GoogleMercator.tiff

A person could at this point use gdal to merge multiple GeoTIFF’s together (if applicable) and then use the gdal2tiles script to generate tiles directly. In my case, my workflow already involves creating tiles with TileMill, so I opted for that route.

This next step is optional in theory but necessary in practice if you want to be able to preview the tiff files in TileMill or other imaging software. What this does is add smaller versions of the GeoTIFF to itself for lower zoom levels.

gdaladdo --config GDAL_CACHEMAX 300 -r cubic Crook_2012_NB_GoogleMercator.tiff 2 4 8 16 32 64 128 256
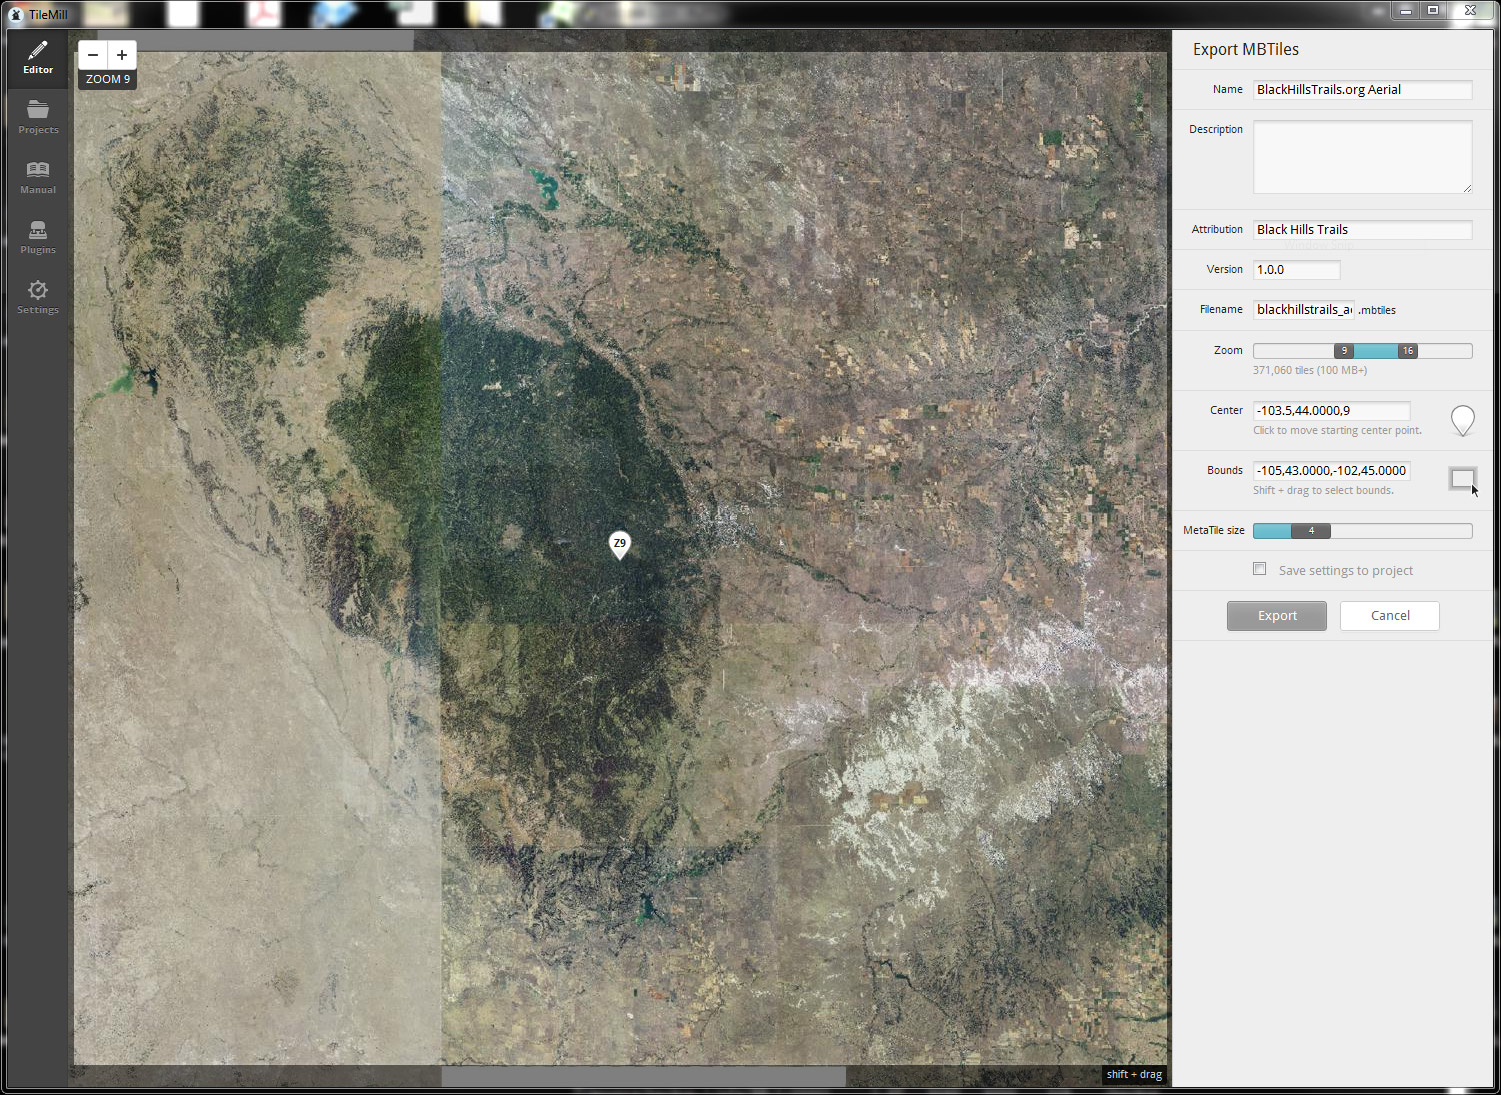
Creating tiles

After all of that is done you can load all of your GeoTIFF’s up into TileMill and see how they look. I give each TileMill layer a class called “geotiff” and use the following style.

.geotiff
{
  raster-opacity: 1;
  raster-scaling: lanczos; /* Best quality but slowest */
}

You can then export tiles using the standard TileMill process.

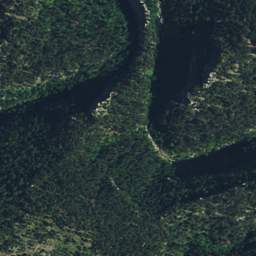
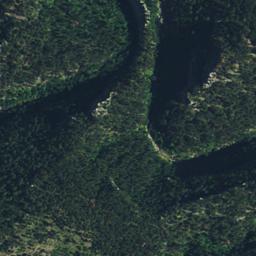
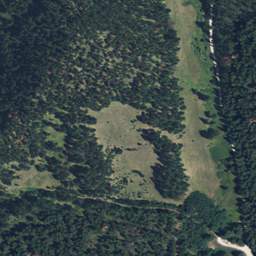
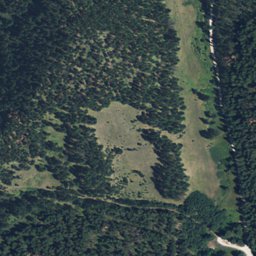
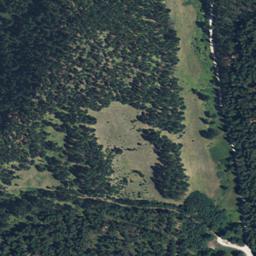
There are always of course extra considerations, such as output image size/quality. When generating map tiles of roadways and the like very often the PNG format is the best choice, but for our aerial imagery we want to use JPEG. Following are two tiles at 3 different quality / compression levels. From left to right, 65%, 75%, 85%.

2013_03_08_mbtile_1_652013_03_08_mbtile_1_752013_03_08_mbtile_1_85
2013_03_08_mbtile_2_652013_03_08_mbtile_2_852013_03_08_mbtile_2_75

Here is what the resulting file size was for the entire area at each of the three quality levels.

3570838528 Mar  7 15:55 aerial_65.mbtiles
4288478208 Mar  6 18:00 aerial_75.mbtiles
5750595584 Mar  6 05:42 aerial_85.mbtiles

Other considerations / Future improvements

Going through this process absolutely explodes the file size. The original NAIP imagery files for my working area are 33,743,711,602 bytes, or a little over 30GB. After converting to GeoTIFF and doing the processing mentioned above, the resulting size of the tiff’s is 952,212,023,220 bytes (closing in on 1TB). One way to greatly reduce this would be to use the JPEG-in-TIFF options that gdal provides.

My biggest complaint with where I am at with this now is that not all of the images are uniform with respect to color, brightness and contrast. gdal provides some options that could be used to adjust these from the command-line, but it would be a very manual process and may take a long time if many iterations are required. I may look at adding some image filters to mapnik (the mapping engine under TileMill) to enable specifying some simple Photoshop-style corrections.

Distances added to maps and descriptions

Distances (in miles) have been added to all of the maps and descriptions on the website. For trail networks without a specific route, such as the Victoria Network, the distance for each trail segment is listed at the end of the description of that segment. For trails that have a defined route, such as Victoria’s Secret,
Victoria 15, and the Victoria Lollipop, the beginning and ending mileage for each segment is listed at the start of the description. For these trails there are also balloons displayed on the map now indicating mileage traveled at certain waypoints.

Some bits from the archives

The sketch below was a concept done in late 2010 prior to the network/trail pages actually being implemented. While this website may be a modern version of a printed guide book, many facets of the site still have origins on paper.

2012_11_1_archive_bits

Victoria Lake Trail Network Update, Site Updates

The site got a new index page a number of days ago which may or may not be more aesthetically pleasing or easy to navigate than the previous iteration. We will continue to iterate on the design and functionality of the website in search of something better than what came before, suggestions are always appreciated.

In that vein, the Victoria Lake area has seen a large update. There are now individual trail pages for Victoria’s Secret, the Victoria 15 Loop, the Victoria Lollipop Loop and there is also a page for the Victoria Lake Trail Network that showcases all of the trails in the area.

Tires for XC, Race or Enduro in the Black Hills

This write-up could probably also be titled, “What are the best all-around tires for riding Black Hills trails?”

Tires are one of the most important equipment choices you have to make on a bike. The air volume, sidewall construction and other attributes that affect the damping properties of the tire can have as significant an impact on your ride as your suspension settings. The tread pattern, rubber compounds, volume and other attributes all affect how well the tire rolls. A better rolling tire always results in a faster, more enjoyable ride but can often come at a traction cost. Every feature of every tire is an exercise is compromise.

Having adequate traction for all of the typical terrain a tire will see is essential to the riding experience. Riding in the Black Hills tends to throw a bit of a curve ball here since it features such a wide variety of terrain. Rocks are prevalent all over the Black Hills, granite, sandstone, limestone and various shales are found mixed with roots and various types of soils. Combine this with the possibility of random rain storms and it becomes difficult to choose just one tire that is able to cope with all of these conditions and remain fast and durable. It seems that many locals have resigned themselves to the sidewall tears caused by the shale and run fairly cheap tires which they repair or replace several times in their lifetime. Others get angry and end up throwing many expensive torn tires away, spending more than they ought on new tires. The majority seems to have settled on running tires with burly tread and stiff, thick sidewalls. This probably seems like a reasonable option to the folks that do it, but they are compromising their ride quality, their climbing ability due to the weight and the speed of the tire due to the high rolling resistance.

Some of the tires you will see a lot on trails in the Black Hills on XC to Enduro bikes:

  • Maxxis Ignitor, Crossmark, Aspen, Ikon
  • Kenda Small Block Eight, Nevegal
  • Specialized The Captain
  • Continental Mountain King, X-King
  • Bontrager 29-2, 29-4
  • Schwalbe Racing Ralph, Nobby Nic

A few years ago riders were stuck between choosing between heavy tires with a thick protective casing or thinner “race” pedigree tires made with better compounds, less rolling resistance and better ride quality. A new class of tire has emerged that bridges this gap, tires like the Maxxis EXO line, Continential Protection and Schwalbe Snake Skin feature what is essentially race tire construction with a lightweight protective layer designed to protect the tire from sidewall (or tread) cuts with minimal impact on ride quality. If you are coming to town for the Dakota Five-0, you will probably be fine on race tires as the Northern Hills in the Spearfish area is largely smoother limestone, but most other places in the Black Hills you will definitely want one of these newer breed of lightweight tires with sidewall protection. They will enhance your ride by rolling faster, absorbing more of the small trail bumps, climbing faster due to lower weight and descending faster because of the better compounds used in this class of tire.

As evidence of the durability of this new breed of tire I offer some images of the rear tire of my Niner Jet9. This tire was first mounted 11 months ago, has done the Laramie Enduro, Leadville and Dakota Five-0 as well as the Tatanka 100 Mountain Bike race and a GPS-documented 1,000+ miles of Black Hills single-track. Most of those single-track miles were in the Rapid City area, where the sidewall destroying shale is most prevalent (Black Hills Back 40 racers beware!). This Schwalbe Racing Ralph with Snake Skin features many pronounced sidewall cuts but has NEVER FLATTED! Although these Schwalbe tires are quite expensive at around $90 per tire, the associated performance and longevity makes that price a relative bargain.

2012_06_28_ralph_1_large
2012_06_28_ralph_2_large
2012_06_28_ralph_3_large
2012_06_28_ralph_4_large
2012_06_28_ralph_5_large

As you can see in the last two photos, the protective “Snake Skin” layer does not extend all the way around the tire, it just covers the sidewalls. The tire has suffered dozens of punctures through the tread area that have been fully sealed by the Stan’s Sealant in the tire. Tubeless is definitely way to go in the Black Hills, but that is a topic for another blog post.

2012_06_28_ralph_6_large
2012_06_28_ralph_7_large

IMBA Trail Care Crew to visit Whitewood, SD

Updated schedule/press release. UPDATE: 7/18/2012. A press release and updated schedule is available for this event. The City of Whitewood hopes that all individuals with an interest will attend some or all of these events. By attending you will not only help to improve a local Black Hills community, but you will also improve your own community by being able to apply what you learned closer to home! RSVP ASAP!

Download the official IMBA Trail Care Crew schedule of events for Whitewood, SD.

The International Mountain Bike Association (IMBA) will be visiting the Black Hills the first week of August to teach and help on a trail project in Whitewood. The schedule of events includes a social and presentation on Thursday evening, August 2nd. Friday afternoon will bring a presentation called Better Living Through Trails, this will be especially interesting to those with a vested interest in the local economy. On Saturday, August 4, the IMBA Crew will teach a 3 hour trail building class starting at 9:00AM and followed by 4 hours of IMBA-led trail construction in the Whitewood City Park. See the official schedule linked above for the full details.

The city of Whitewood is incredibly excited to have the opportunity to host the IMBA for this event and hope that everyone with an interest will attend one or more of the events. Visit the IMBA website to register for any of these events.

See our prior post for a little background.

Dakota Five-0 Entry Giveaway Results

The random number generator has done its thing and we have two winners in the Dakota Five-0 Entry Giveaway! PahaSapaTrails.com would like to thank all who entered, we hope PahaSapaTrails.com will become an increasingly valuable trail resource to all of you in the future!

Congratulations to our winners, David Unkenholz and local Josh Christiansen — we’ll see you in September!

Dakota Five-0 Entry Giveaway!

PahaSapaTrails.com has secured two entries to the 2012 Dakota Five-0, to be given away to two lucky folks that like us on Facebook! Click here to visit the giveaway sign-up form!

The word is obviously out about what an amazing event the Dakota Five-0 is, this year it sold out in just a few hours! If you were unable to sign-up in time and did not get in on the waitlist, we here at PahaSapaTrails.com want to give you a third chance at this amazing Black Hills event. SIGN UP HERE before the June 8 deadline!